Last updated November 18, 2026





Free written scope consultation - allowances, timeline, and change-order rules on paper before a single trade is scheduled
DIY vs Professional Bathroom Remodeling: What’s Safe to Do Yourself
Installing a vanity yourself can save $400. Rerouting a drain line yourself without a permit can cost you $12,000 when you sell and the inspector finds unpermitted work buried behind new tile. That gap between cosmetic savings and structural liability is the whole ballgame, and it’s the one thing most DIY guides skip over. The real question isn’t whether you’re handy enough. It’s whether the task sits inside or outside the wall. This guide draws that line clearly so you can decide what’s genuinely safe to take on in a Richmond bathroom and what needs a licensed trade before you touch a single fitting.
Quick Answer
Safe DIY bathroom work is anything cosmetic and surface-level: paint, hardware, mirror swaps, swapping a vanity top, re-caulking, accessory installs. Anything inside the wall or tied to water, power, or the building structure is professional territory: plumbing rough-in, electrical circuits, waterproofing membranes, subfloor repair, and anything requiring a permit. In Richmond, the permit line is the one you cannot afford to ignore, because unpermitted bathroom work becomes a disclosure and resale problem whether or not it ever leaks.
Styles & brands we work with
- Kitchen remodeling
- Bathroom remodeling
- Home additions & ADU
- Roofing
- Windows & doors
- Driveway & pavers
- Fence
Table of Contents
- The Inside-the-Wall Rule: Where DIY Stops
- Task-by-Task Breakdown: What’s Safe to Do Yourself
- Why California Permits Turn DIY Bathroom Work into a Resale Liability
- The Hidden Costs of DIY Mistakes in a Wet Environment
- How to Tell a Code-Compliant Tutorial from a Shortcut
- The Hybrid Approach That Actually Saves Money
- Richmond-Specific Reality: Climate, Housing Stock, and Codes
- Common Mistakes to Avoid
- When to Call a Professional
- Frequently Asked Questions
The Inside-the-Wall Rule: Where DIY Stops
Here’s the boundary that governs every decision in this guide. If a job requires you to open a wall, get into the wet wall behind your shower, pull a wire through a stud bay, or alter the waterproof envelope of the room, it’s inside-the-wall work. Everything else is outside-the-wall work, and outside-the-wall is where a capable homeowner can honestly save money.
The reason the distinction matters so much in a bathroom, more than any other room, is that everything in a bathroom is engineered around water. A kitchen has water in specific zones. A bathroom is wet almost everywhere. That means the consequences of a mistake compound: a bad tile joint ruins a weekend, but a bad waterproofing job behind a shower wall rots a subfloor, grows mold for a year, and then fails visibly all at once. The cost curve isn’t linear. It’s flat until it isn’t.
Outside-the-wall tasks include:
- Painting walls, ceilings, and trim
- Swapping vanity hardware, faucets, and showerheads (like-for-like, no new rough-in)
- Replacing a mirror, medicine cabinet, or light fixture on an existing box
- Re-caulking tub and shower seams
- Installing towel bars, shelves, and accessories
- Replacing a toilet with a same-location, same-rough-in model
- Swapping a vanity top and sink onto the existing cabinet and drain location
Inside-the-wall tasks include:
- Moving a drain, supply line, or vent
- Adding, moving, or replacing an electrical circuit or outlet in the wet zone
- Installing a shower pan, curb, or waterproofing membrane
- Framing changes, moving a wall, or relocating a doorway
- Subfloor repair or replacement
- Any work requiring a building permit
If you can honestly sort your project through these two lists, you’re already ahead of most homeowners who end up calling a contractor halfway through a demo with a hole in the floor.
Task-by-Task Breakdown: What’s Safe to Do Yourself
This is where the theory gets concrete. Here’s how the individual jobs typically found in a bathroom remodel sort out both for safety and for whether they trigger a permit in Richmond. Use this as your planning table.
- Paint and trim. DIY-safe. No permit. Use a bath-rated paint with mildew resistance, and give it 72 hours of full ventilation in a Richmond summer before you judge the color.
- Vanity hardware and faucet swap. DIY-safe when the existing water connections remain in the same location. Turn the water off at the stub-outs, not just the valve, before you start.
- Mirror and light fixture swap. DIY-safe when you’re replacing a fixture on an existing junction box and keeping the same amperage. Anything that adds a light, moves a switch, or touches a GFCI circuit in the wet zone is a licensed-electrician job.
- Re-caulking tub and shower. DIY-safe and genuinely important. Strip the old caulk fully, clean with a mildew remover, let it dry completely, and use a silicone rated for wet areas.
- Toilet replacement. Often DIY-safe if the new toilet uses the same rough-in distance and sits in the same spot. If you’re moving the toilet even six inches, it’s a plumbing job and a permit.
- Vanity top and sink swap. DIY-safe if the drain and supply lines stay put. This is the $400 savings in the hook, and it’s real.
- Shower or tub replacement. Not DIY. This is where waterproofing membranes, drain connections, and valve rough-ins live, and every one of them is a permit item and a fail point.
- Tile in a wet area. Not DIY for a first-timer. Tile itself is learnable, but the waterproofing underneath it isn’t forgiving. Cement board is not a waterproofing membrane, and neither is a painted-on sealer.
- Electrical in the wet zone. Licensed electrician, no exceptions. GFCI protection, dedicated circuits for a heated floor or towel warmer, and exhaust fan wiring all belong to a professional.
- Framing, subfloor, and wall relocation. Licensed and permitted. This is where a “small” project quietly becomes a full remodel.
Notice the pattern: the safe list is short, surface-level, and reversible. The unsafe list is everything you’d need to undo a wall to fix.
Why California Permits Turn DIY Bathroom Work into a Resale Liability
California doesn’t regulate bathroom work casually. Plumbing, electrical, and structural work in a bathroom generally require a permit, and locally that means pulling one through the City of Richmond’s building department. Homeowners can pull some permits themselves, but they still owe the same inspections and the same code compliance as a licensed trade. A permit you pull yourself doesn’t make the work safer. It just makes it discoverable.
Here’s why that matters more than the safety lecture. In California, sellers must disclose known unpermitted work on the Transfer Disclosure Statement. When a buyer’s inspector finds a shower valve, a relocated drain, or a new circuit that wasn’t permitted, three things happen. The buyer negotiates a price reduction. The lender questions the appraisal. And your timeline to close gets a real chance of blowing up. We’ve watched a Richmond seller in the Iron Triangle lose most of a $12,000 negotiation on a bathroom shower rebuild completed two owners earlier without a permit. Nobody intended that outcome. The work looked fine. It was still a title problem.
The resale math is brutal because it’s asymmetric. A permit costs a few hundred dollars and an inspection or two. Unpermitted work, once discovered, costs the entire negotiation seat. You’re not just remediating the work; you’re remediating the buyer’s confidence.
Richmond’s housing stock makes this a live issue rather than a theoretical one. In older homes near the Marina Bay waterfront and throughout the Pullman and Coronado neighborhoods, we regularly find original bathroom assemblies that have already been quietly modified by prior owners across multiple decades. Each unpermitted layer compounds the next. When we open a wall in these homes, the correct question isn’t “was the last renovation done well?” It’s “how many permits exist that document each layer?”
The Hidden Costs of DIY Mistakes in a Wet Environment
The first dollar you spend on a DIY mistake is almost never the biggest one. In a bathroom, the real money hides downstream: rot, mold, and re-done tile. Here are the failure modes we see most often, and roughly what they cost to fix once the damage has had a year to mature.
- Mold remediation. A shower pan that wasn’t sloped correctly can grow mold inside the wall for a year before it shows. Once it does, remediation means opening the wall, treating the framing, and rebuilding. It routinely costs several thousand dollars and it’s often not covered by a standard homeowner policy because it’s classified as a maintenance failure.
- Subfloor replacement. A slow tub leak degrades the plywood and joists underneath. By the time it’s visible at the ceiling below, you’re replacing a subfloor, not patching it.
- Tile re-do. A waterproofing failure under a shower wall means the tile and cement board both come off to get to the failure. The tile itself was never the problem. It’s still the casualty.
- Exhaust fan failure. An undersized or improperly vented fan drives moisture into the wall cavity instead of out. In a Richmond winter, that shows up as paint peeling and mildew along the ceiling line within a season.
- Voided insurance. Damage caused by unpermitted work is a common claim denial reason. That’s the hidden cost most homeowners never think to check.
Nothing on this list is dramatic on its own. Together they are why professional bathroom remodeling in Richmond typically runs $12,000 to $28,000 for a mid-grade refresh while a purely cosmetic DIY pass runs $1,500 to $4,000. The gap isn’t labor markup. It’s the cost of doing the wall work correctly, once.
How to Tell a Code-Compliant Tutorial from a Shortcut
YouTube is a genuinely useful tool for learning a task. It’s also a minefield of procedures that pass visual inspection and fail code years later. The trick is knowing which videos are teaching a real method and which are showing a shortcut that happens to look fine on a completed job.
Here’s a practical vetting process. Before you follow any tutorial, run it through these checks.
- Does the presenter name the code or the code cycle? A legitimate tutorial will reference the California building code, the Uniform Plumbing Code, or the National Electrical Code, and often the specific edition. A shortcut video will say “this is how pros do it” and skip the citation.
- Does the tutorial show the permit or the inspection? Real pros document permit work. If the video is a full bathroom rebuild and no permit drawing or inspection appears, that’s a warning sign.
- Does it treat waterproofing as a product or a method? A code-compliant shower build uses a recognized waterproofing system (a liquid membrane, a sheet membrane, or a bonded system) with specified thicknesses and overlaps. Shortcuts skip the membrane and rely on cement board and caulk.
- Does it vent the plumbing? Every fixture that drains needs a vent. A tutorial that reroutes a drain without addressing venting is teaching a future gurgle and a code fail.
- Does it address the slope? A shower pan needs slope to the drain, and a tub surround needs a backer at every joint. Any tutorial that relies on tile and grout to do the waterproofing has skipped the part that actually keeps water out of the wall.
- Is the presenter a licensed trade in the state you’re in? California-specific methods differ from Florida-specific methods, especially on waterproofing and venting. A great video for a Texas slab foundation can be flat wrong for a Richmond crawlspace.
When in doubt, cross-reference two or three tutorials from licensed trades against the actual manufacturer installation instructions for the product you’re using. The manufacturer’s instructions are legally binding in most code adoptions, they’re free, and they’re the reference an inspector will use.
The Hybrid Approach That Actually Saves Money
The single biggest money-saving decision most Richmond homeowners overlook is the hybrid model: you take the demolition and finish work, and a licensed trade handles everything behind the wall. It saves real money without putting you on the wrong side of a permit or a waterproofing membrane.
Here’s how that typically plays out.
- You demo. Pulling a vanity, a toilet, tile, and drywall is the cheapest line item in a remodel and the one most contractors are happy to hand off. You save real hours and you don’t jeopardize anything structural as long as you stop at the studs and don’t cut into plumbing or wiring.
- A licensed plumber moves the rough-in and pulls the permit. Drain relocation, valve replacement, and venting all belong here. This is also where the permit gets pulled, which protects your resale.
- A licensed electrician handles the wet-zone circuit. GFCI, exhaust fan, dedicated heating circuit, and any new lighting all live here.
- The waterproofing and tile go to a professional tile setter. This is the hardest part to fake and the most expensive part to redo.
- You take back the finish work. Paint, trim, mirror, hardware, accessories, and the final caulk line. You also handle the punch list, the cleanup, and the disposal run.
On a typical Richmond bathroom refresh, this hybrid approach saves roughly 15 to 25 percent of the all-in cost versus a fully outsourced job, and it keeps the permit, the membrane, and the rough-in in the hands of licensed trades. It’s how we’d approach our own homes. It’s also how a real renovation budget actually gets respected instead of eaten by mid-project surprises.
If you want to see how the same approach plays out on larger projects, our guide to Home Additions & ADU in Richmond covers where the DIY boundary gets much stricter, and our Fence Installation in Richmond page shows how the exterior trades handle their own version of the inside-the-wall line.
Richmond-Specific Reality: Climate, Housing Stock, and Codes
Richmond isn’t a generic bathroom market. The Bay Area fog and marine layer push moisture into a home more than most of the country, and our housing stock compounds the effect. A bathroom in Point Richmond faces different humidity and different original construction than a newer build in Marina Bay. Here’s what that means in practice.
In Point Richmond and the older parts of the Iron Triangle, bathrooms frequently sit at the end of a long run of original galvanized supply line. That galvanized pipe is often the actual reason a “simple” vanity upgrade turns into a full re-pipe. We’ve watched homeowners open a wall for a faucet swap and find pipe that was already one winter from failing. The right call there is a plumber, not a deeper trip into the hardware store.
In the hillside neighborhoods like North & East and the El Sobrante edge, bathrooms often sit over a crawlspace. That crawlspace is exposed to the marine air and stays damp through winter. Any subfloor repair there has to be paired with ventilation work and vapor control, or the repair is just seed money for the next repair.
In Coronado, Iron Triangle, and Pullman, the pre-war homes mean bathroom framing is often original, sometimes with lath-and-plaster behind the tile. That changes the waterproofing method, the fastening schedule, and the whole approach to demo. A wall that looks like drywall can be plaster over wood lath, and the wrong demo method takes out more than you planned.
Richmond also runs on the California Building Code with local amendments, and the city building department handles its own permits and inspections. Timelines vary with permit volume, and having a licensed trade pull the permit rather than a homeowner pull it, then try to manage the inspection trade-by-trade, removes a real source of delay.
If you want the exterior corollary, our page on Driveway & Pavers in Richmond covers the same inside-versus-outside line in a landscaped environment, and the Groundwork Construction Co. of Richmond home page ties it all together.
Common Mistakes to Avoid
- Pulling the waterproofing out of the tutorial. Cement board is not a membrane, and neither is thinset alone. In a Richmond marine climate, a shower wall without a real waterproofing system will grow mold inside the wall long before the tile tells you.
- Skipping the permit to “save time.” Richmond permits take a few weeks, not a few days, and rolling the dice here puts your resale on the line. The permit is the cheapest part of a bathroom remodel and the most expensive one to skip.
- Moving the toilet without addressing the vent. A relocated drain without a vent gurgles for a month, then fails the next inspection. It’s also one of the top three permit-inspection red flags we see on Richmond bathroom jobs.
- Trusting a 2015 YouTube tutorial for a 2025 California code. Code has moved, especially on GFCI protection and exterior-rated products. Check the presenter’s state and the code cycle.
- Buying the vanity before checking the rough-in. Vanity sizes are nominal, and real cabinets don’t fit rough openings the way the box measures. Measure the actual stub-out and drain locations before the furniture shows up.
- Re-caulking over active mold. Caulk is not a remediation product. A moldy seam means the moisture source is still active, and the next caulk job will look exactly like the last one.
- Running the exhaust fan into the attic. In Richmond, that’s an invitation to attic mold within a season. The fan has to vent outside, not into the building envelope.
When to Call a Professional
Call a professional the moment your project crosses the wall. That means any drain or supply line move, any new or relocated electrical circuit in the wet zone, any shower pan or waterproofing membrane install, any tub or shower replacement, any subfloor repair, any framing change, and anything the City of Richmond requires a permit for. It also means any project in an older Richmond home where you don’t yet know what’s behind the tile. We’d rather quote the project honestly than have you discover the real scope on the back side of a demo you started on a Saturday.
Groundwork Construction Co. of Richmond offers free estimates across Richmond, including Point Richmond, Marina Bay, Iron Triangle, Coronado, and Pullman, with upfront pricing and no change-order surprises. Call (833) 700-4611 to schedule yours, and see how our Driveway & Pavers in Richmond team and the Home Additions & ADU in Richmond crew handle their own scope as a full-service construction partner from foundation to finish line.
Frequently Asked Questions
You can handle the cosmetic and finish work yourself: paint, hardware, mirror swaps, re-caulking, and a like-for-like vanity top or toilet replacement. Anything inside the wall, including plumbing rough-in, electrical in the wet zone, waterproofing membranes, and subfloor repair, needs a licensed trade and usually a permit from the City of Richmond’s building department.
Any work that moves plumbing, adds or alters an electrical circuit, changes framing, relocates a fixture, or replaces a shower or tub assembly generally requires a permit. Cosmetic work like paint, hardware, and like-for-like fixture swaps typically does not. Call the City of Richmond building department to confirm for your specific project, and always pull the permit before the work starts rather than after.
Yes, and the damage is often disproportionate. California requires disclosure of known unpermitted work on the seller’s Transfer Disclosure Statement, and Richmond buyers’ inspectors routinely catch unpermitted showers, plumbing moves, and electrical work. We’ve seen a single unpermitted shower rebuild eat most of a six-figure negotiation. The permit is far cheaper than the discount.
Improper waterproofing behind a shower is the one that hurts the most, because it fails silently for months to a year before the wall tells you. The second is unvented or undersized electrical work in the wet zone, which becomes a real shock hazard once a GFCI trip is bypassed. Neither mistake looks dangerous from the finished side.
Demo is typically the cheapest line item in a bathroom remodel, and doing the demo yourself often saves 5 to 10 percent of the all-in cost. Our hybrid approach – you demo, licensed trades handle the rough-in and waterproofing, you take back the finish work – generally saves 15 to 25 percent while keeping the dangerous work with the professionals. Call (833) 700-4611 for a free estimate on the portion you want to hand off.
A typical mid-grade bathroom remodel runs three to five weeks from demo to final walkthrough, and permits add one to three weeks depending on Richmond’s inspection backlog. If a shower or tub replacement is part of the scope, expect closer to five or six weeks. Call (833) 700-4611 for a written quote with timing built in, and estimates are free.
The Bottom Line
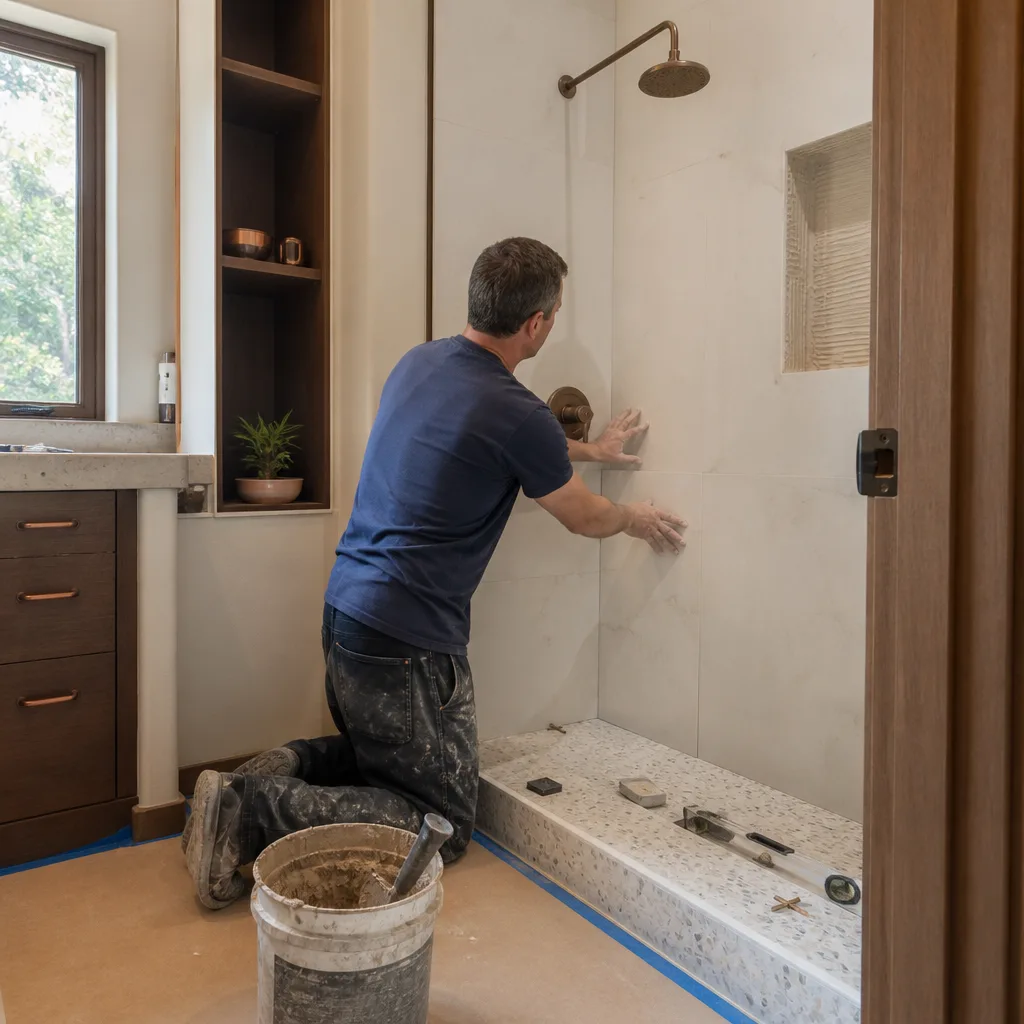
The question isn’t whether you’re handy. It’s whether the task lives inside or outside the wall. Outside the wall, DIY is genuinely safe: paint, hardware, finishes, and a like-for-like vanity or toilet swap. Inside the wall, licensed trades and a City of Richmond permit protect your safety and your resale. The hybrid model – you demo and finish, they rough in and waterproof – is where the real savings live without creating a title problem. If your project crosses that line and you want a straight quote, call (833) 700-4611 to schedule a free estimate with Groundwork Construction Co. of Richmond.
Written by the team at Groundwork Construction Co. of Richmond.
See the difference
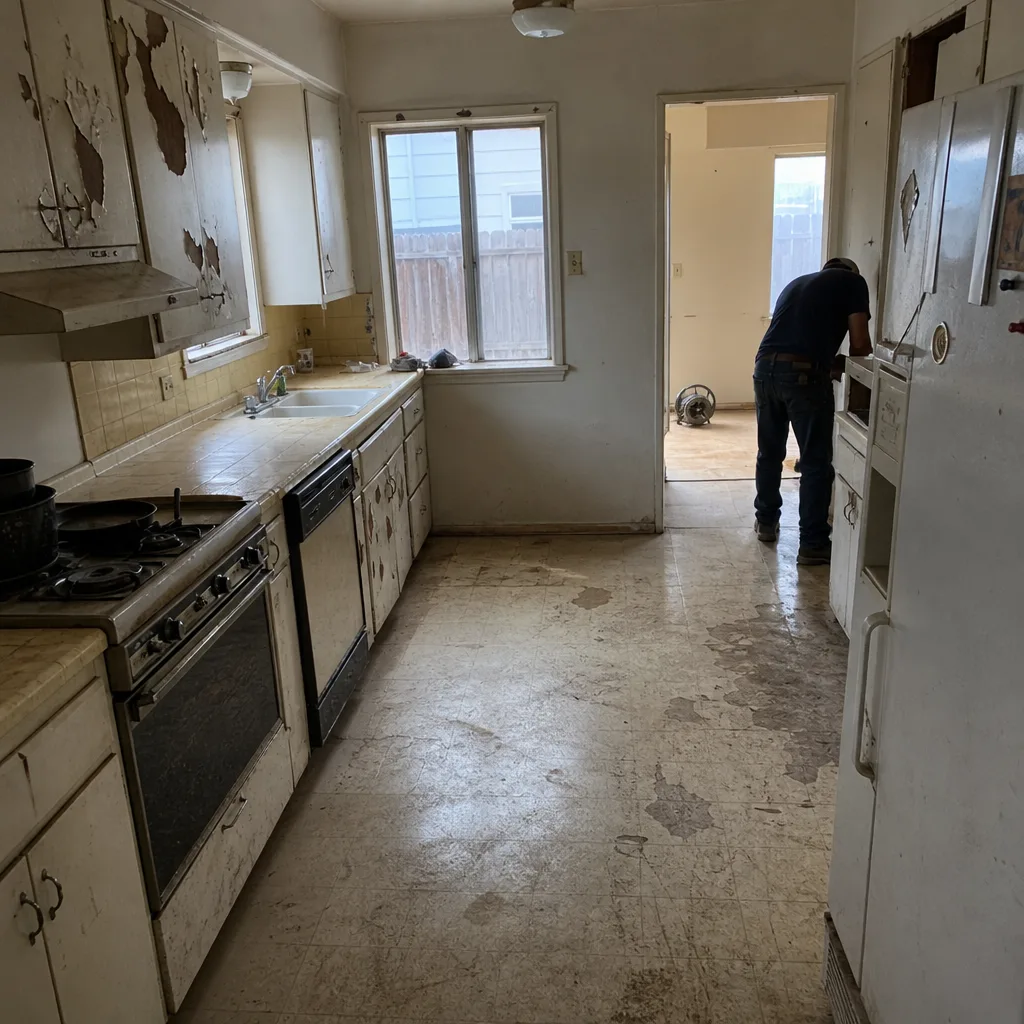 Before
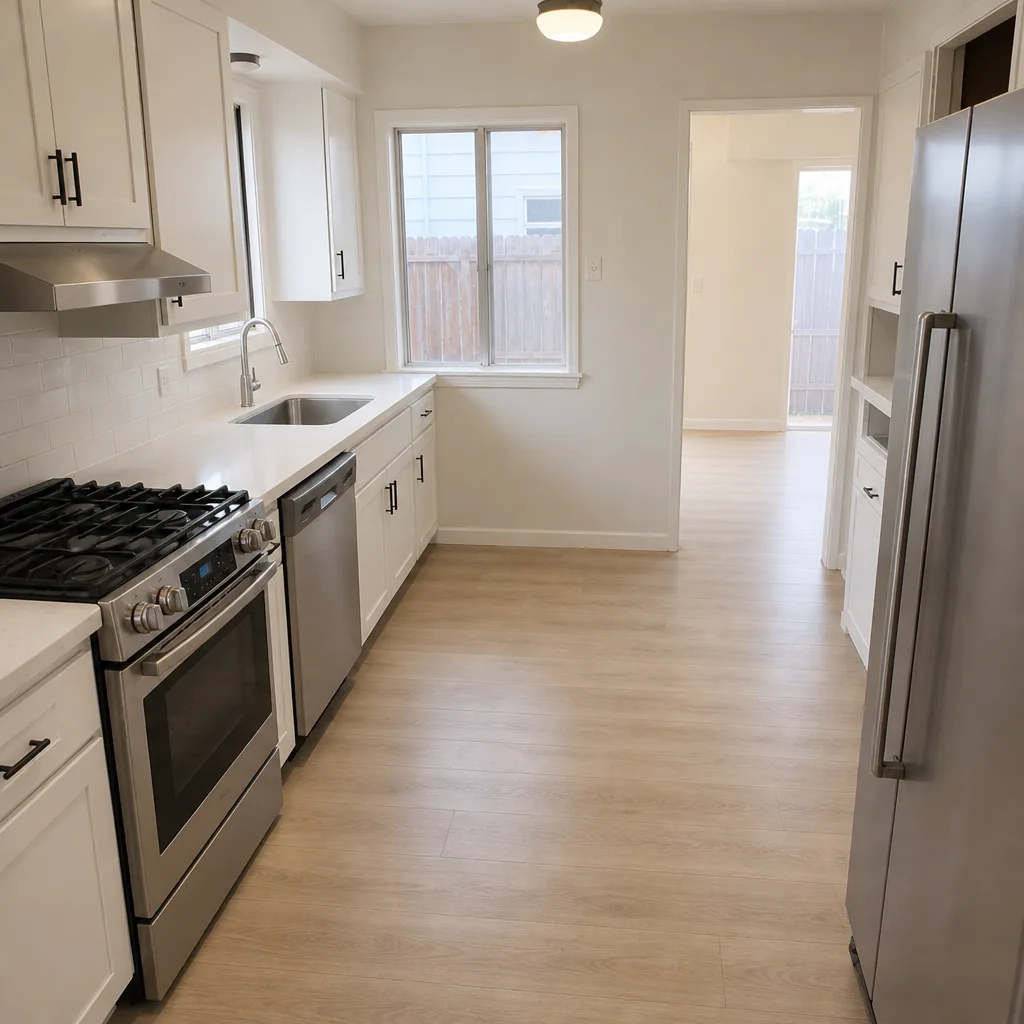 After
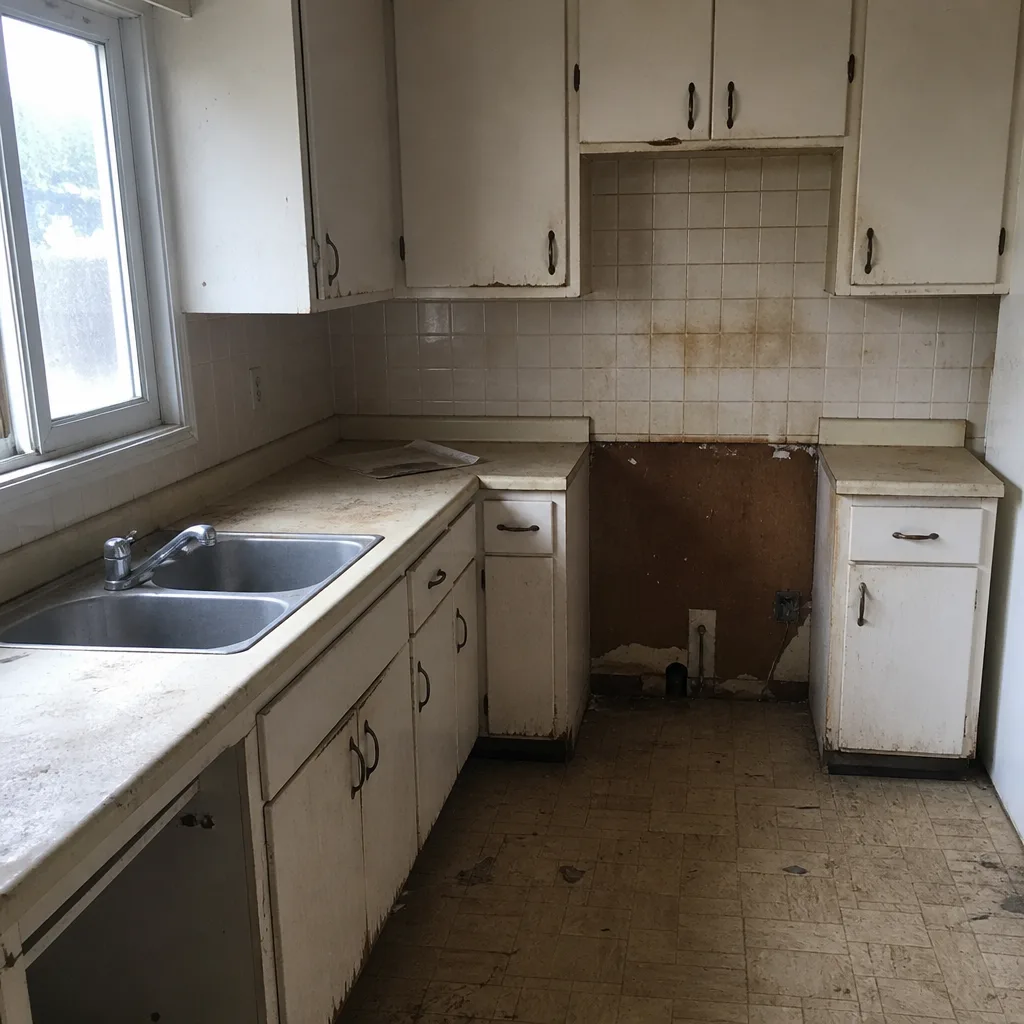 Before
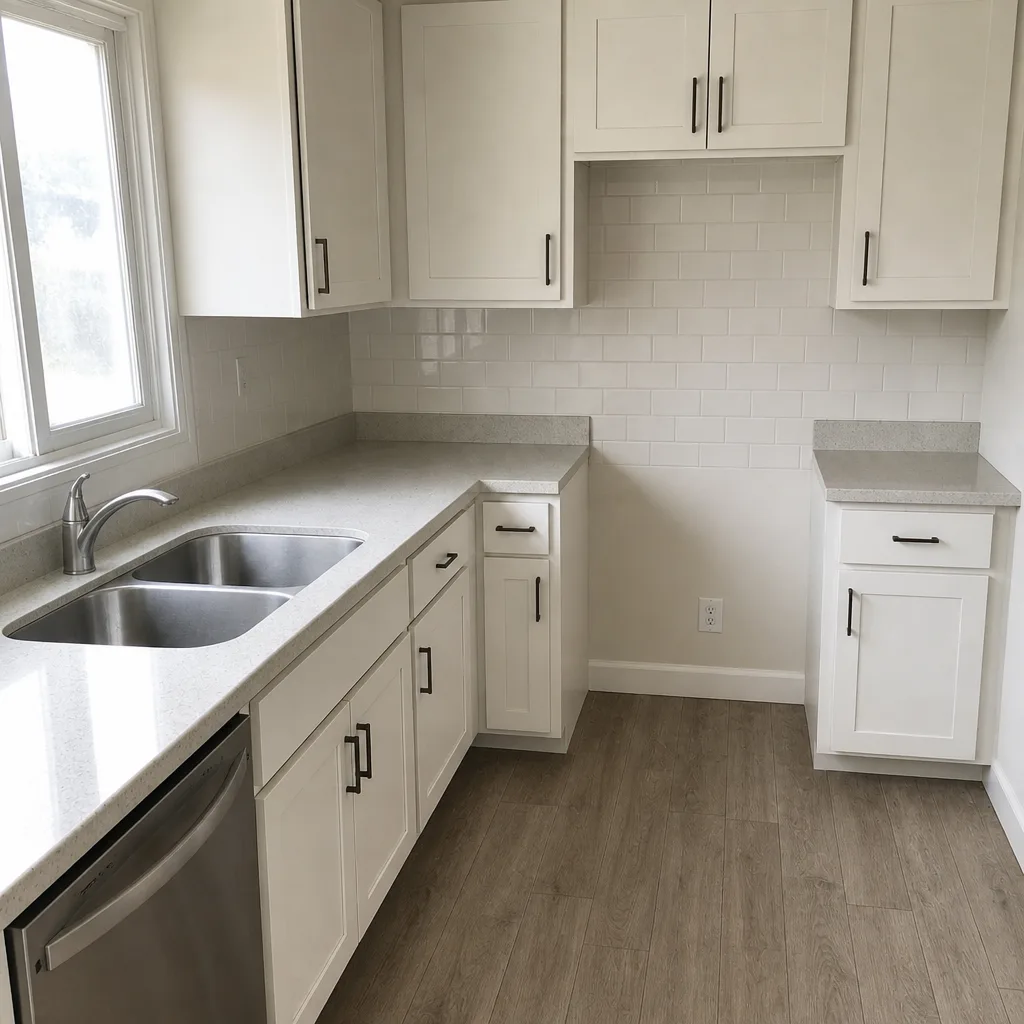 After
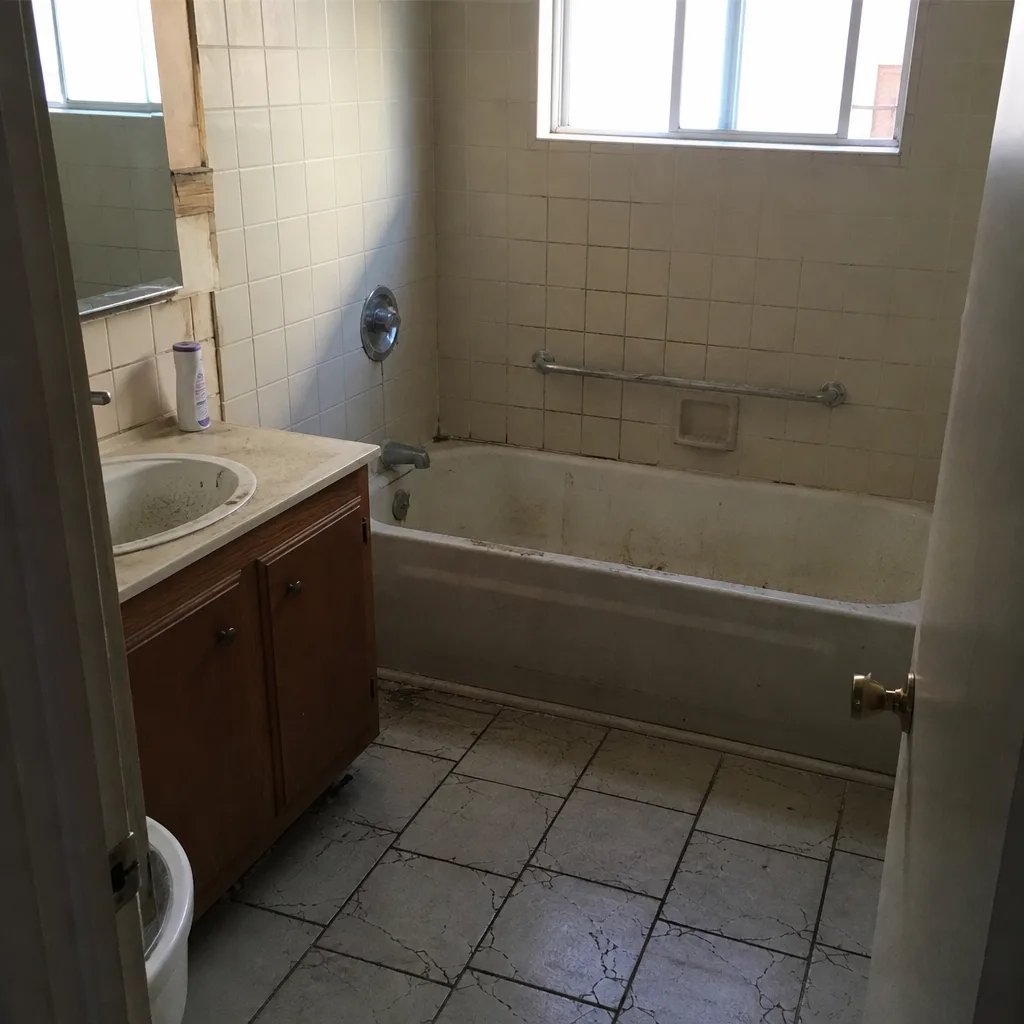 Before
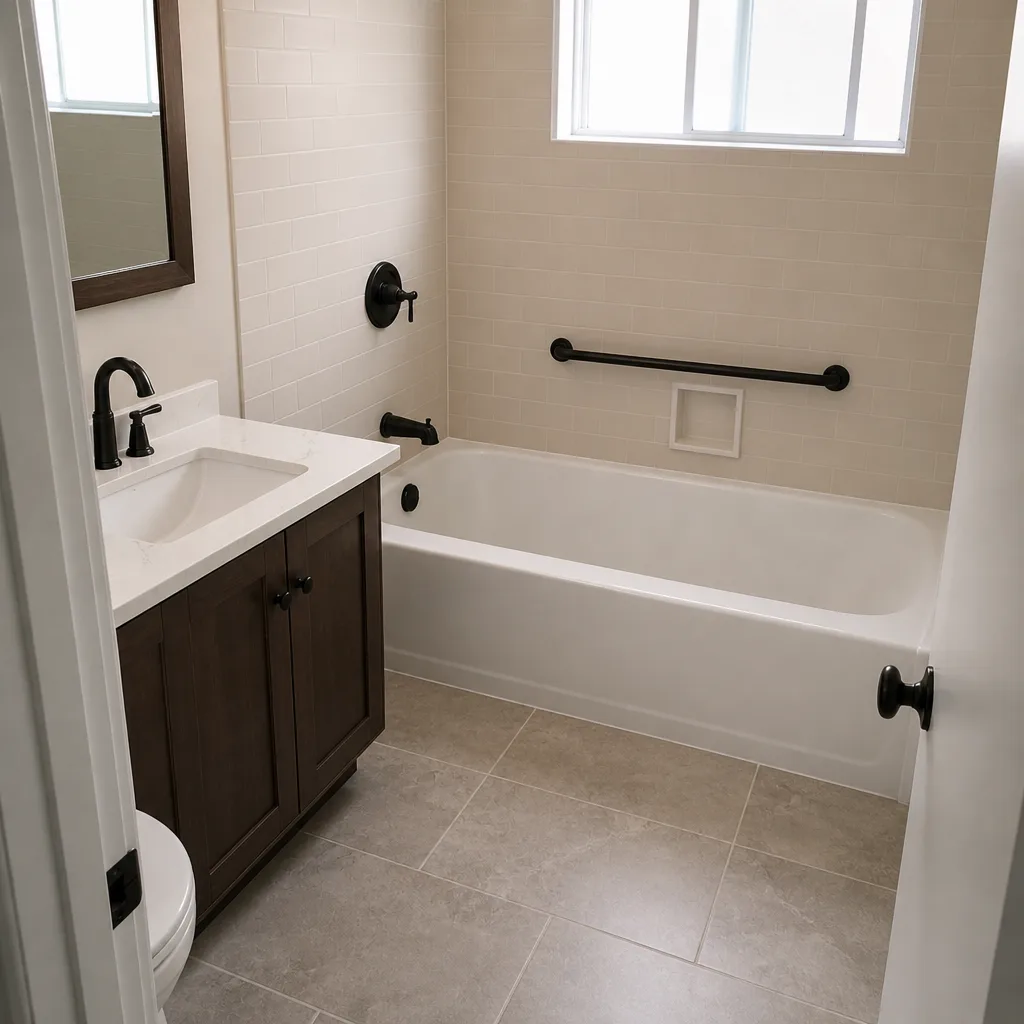 After