Last updated November 18, 2026




Free written scope consultation - allowances, timeline, and change-order rules on paper before a single trade is scheduled
DIY vs Professional Fence Installation: What’s Safe to Do Yourself
Homeowners who install their own fence without pulling a permit aren’t saving money. They’re creating a title problem they’ll discover at the worst possible time: during a home sale. We’ve watched escrow stalls and last-minute permit scrambles in Richmond that cost more to fix than the fence ever saved, and the pattern repeats often enough that it’s worth naming up front. This guide is about where the real risk actually lives – not in whether you can swing a post hole digger, but in setbacks, neighbor law, footing engineering, and permit compliance. We’ll separate the tasks a careful homeowner can genuinely handle from the ones that quietly turn into expensive problems.
Quick Answer
Staining, hardware swaps, minor rail repair, and replacing a single picket or two on an existing fence are safe to handle yourself. Installing a new fence line – digging footings, setting posts, and managing setbacks, permits, and property lines – is not a good DIY candidate in Richmond, because a single compliance or line error can cost more to fix than the whole fence. Professional installation earns its price mainly on the parts you can’t see once the fence is done: legal footing depth, correct setbacks, and a clean permit record.
Styles & brands we work with
- Kitchen remodeling
- Bathroom remodeling
- Home additions & ADU
- Roofing
- Windows & doors
- Driveway & pavers
- Fence
Table of Contents
- What’s Actually Safe to Do Yourself
- The Permit Problem Nobody Warns You About
- Footing Depth in Richmond’s Clay Soil
- Property Lines, Neighbors, and California Law
- DIY vs Professional Fence Installation: A Real Cost Comparison
- What Professional Fence Installation Actually Involves
- Common Mistakes to Avoid
- When to Call a Professional
- Frequently Asked Questions
What’s Actually Safe to Do Yourself
You can do a lot of fence work yourself, and we’d rather tell you that plainly than push you into a full install you don’t need. The safe zone is maintenance on a structure that already exists and is already permitted. If the posts are solid and the fence line is where it belongs, a homeowner with basic tools can handle most touch-up work.
Here’s the list of work that doesn’t carry hidden legal or structural risk:
- Staining and sealing. A barrier or oil-based stain on a wood fence extends its life in Richmond’s moisture and sun cycle. It’s labor, not engineering.
- Hardware swaps. Replacing gate hinges, latches, gate springs, and rusted fasteners on an existing gate is straightforward and cheap.
- Minor rail replacement. If a single rail has cracked, swapping it out on a standing, plumb post doesn’t change the fence’s structural system.
- Picket and board replacement. Swapping individual pickets on a picket fence, or warped boards on a privacy fence, is reasonable as long as the posts stay put.
- Gate adjustment. A gate that sags because hinges loosened is a maintenance fix, not a rebuild.
The line is structural and legal, not physical. Once you start setting new posts, changing the fence line, or altering the height, you’ve crossed from maintenance into construction – and construction is where permits, footings, and property lines start to matter. If your project is really a fence replacement rather than a repair, that’s the dividing point to pause at.
There’s also a materials detail worth knowing. Fence systems like those from Barrette and Master Halco are engineered to specific post spacing and hardware, and a homeowner replacing boards on a system fence needs to match the manufacturer’s spacing. Replace a board with the wrong thickness on a resin panel system and the panel fit degrades. That’s a small, real example of why staying inside maintenance is easier than starting fresh.
The Permit Problem Nobody Warns You About
An unpermitted fence doesn’t show up as a problem until a title search or a home inspection surfaces it. Then it becomes a line item in escrow, and the clock is running against your sale. This is the part of the DIY fence conversation most people miss entirely: it’s not about whether the fence looks fine today, but whether the paperwork behind it survives a sale.
In Richmond and across most of the Bay Area, fences over a certain height – typically around 6 feet, with variations for front yard setbacks and corner lots – require a building permit. The exact threshold, the required setback from the property line, and the allowed height on a corner lot depend on your zoning and lot orientation. A fence in the side or rear yard faces different rules than a fence along the front.
What happens when a fence is installed without a permit varies, but the practical outcomes are consistently painful:
- Escrow holds. A buyer’s lender or title company can flag an unpermitted structure, and sale timelines slip while it gets resolved.
- Retroactive permits. You can usually get a permit after the fact, but the work has to pass inspection, which can mean digging up and re-pouring a footing that doesn’t meet code.
- Removal orders. In some cases, a fence built too close to the property line or over the height limit has to come down before a permit can be issued.
- Buyer leverage. Even when a fence can be permitted retroactively, an unpermitted structure gives a buyer room to renegotiate price or demand a credit.
- Insurance questions. Some insurers ask about permitted structures, and an unpermitted fence can be a snag during a claim.
A pull-and-replace of a footing to satisfy an inspector can run into the high hundreds to low thousands per post depending on the situation, which is more than the permit and inspection would have cost. If you’re planning anything more than a repair, talk to a contractor who can tell you whether your specific lot needs a permit before you buy a single bag of concrete. The Fence Installation in Richmond service is a useful place to start understanding what a compliant install looks like in this market.
Footing Depth in Richmond’s Clay Soil
A fence post is only as good as the footing under it, and this is where “close enough” turns into a real problem in Richmond. This region’s soils include clays and expansive material that move with moisture, which is why a post set to a shallow depth in the dry season can be leaning by the second winter. Post footings aren’t a judgment call – they’re an engineering decision tied to fence height, wind load, soil type, and frost depth.
What professional installers account for that a first-time DIYer usually doesn’t:
- Depth below the surface line. Footings need to sit deep enough to reach stable, less moisture-active soil, which typically means well below the frost line and the seasonal movement zone.
- Footing diameter. A tall privacy fence carries more wind load than a short picket fence, and the hole size and concrete volume have to match the load.
- Concrete, not gravel alone. Packed gravel can feel solid for a season and let go. Concrete set to depth is what holds a post plumb.
- Drainage and grading. Water pooling at a post base is the most common cause of rot and shifting. The footing design has to move water away, not trap it.
- Post material and fastener compatibility. Treated wood, steel, and resin systems all have different footing requirements, and getting the combination wrong shortens the fence’s life.
This is the single most common way a DIY fence fails. A do-it-yourselfer with a rented auger tends to dig to whatever depth is easiest, not to the depth the wind load requires on that specific fence height. The fence looks fine for a year, then a post leans, then a gate won’t latch, then a section sags. By the time you’re re-digging, you’ve spent more hours than a pro would have needed to install it correctly the first time.
Say plainly what we’d tell any Richmond homeowner: setting footings is the part most likely to cause sore muscles, a weekend lost, or a repair bill later. Go to a licensed contractor for the footing work, and treat the finishing and maintenance as your part of the project. That split is where the real safety line is on a fence project.
Property Lines, Neighbors, and California Law
Where a fence sits relative to a property line is where DIY fence projects turn into legal disputes, and in California the rules favor the person who can prove their line. A fence built even a foot onto a neighbor’s property can become a problem the moment a survey is done – and surveys are commonly done when either home sells. That means a fence you installed years ago can suddenly be a boundary dispute.
What California and Richmond-area practice expects:
- Know your setbacks. Local code sets how far a fence must sit from a property line and how tall it can be, and it varies by lot type and zone. Front yards are treated differently from rear yards.
- Get a survey before you dig. A fence company that installs a fence on an unverified line is gambling with your money. A licensed contractor will either use a recent survey or tell you one is needed.
- Neighbor notice is good practice. California code broadly supports a property owner’s right to a fence, but a quick conversation before construction prevents most disputes. A fence that a neighbor feels was installed without notice can become a complaint to the city, which then triggers an inspection.
- Shared fence lines. If a fence sits on the boundary between two lots, who pays and who maintains it is a matter of agreement, and it’s worth putting in writing.
- HOA and easement rules. Even where the city allows a fence, an HOA or a utility easement can restrict height, material, or placement. Checked before the first post goes in, that’s a five-minute question. Discovered afterward, it’s a rebuild.
The most expensive DIY fence mistake we’ve seen isn’t a wobbly post. It’s a perfectly built fence on the wrong side of the line. A contractor can absorb that kind of error because they check first; a homeowner usually can’t, and the neighbor gets a fence they didn’t pay for and a dispute that outlasts the fence.
DIY vs Professional Fence Installation: A Real Cost Comparison
The DIY case is strongest on a short, simple fence on flat ground well inside your property line, and we’ll give you the honest math for that. For anything taller, longer, or anywhere near a property line or a permit threshold, the numbers stop favoring DIY once you count the real inputs. Here’s how it breaks down at Richmond-area labor rates.
Cost of a DIY fence project, by line item:
- Materials: Running roughly $15 to $35 per linear foot for common wood and resin systems, plus gates, posts, and concrete.
- Tool rental: Auger, level, and related tools, typically $100 to $300 for a project weekend.
- Concrete and hardware: Often $150 to $400 depending on post count.
- Permit: A modest fee, typically well under $500, that DIYers often skip, which is the expensive choice.
- Your time: Realistically 30 to 60 hours of labor for a 100-foot fence, including the digging.
- Repair risk: A footing that fails in year two can cost several hundred to over $1,000 per post to redo.
Cost of professional installation, by line item:
- Materials: Similar per-foot cost, sometimes less because a contractor buys at trade pricing.
- Labor: Usually the largest line item, priced per foot and adjusted for terrain, removal of an old fence, and gate count.
- Permit and inspection: Handled, often rolled into the quote.
- Survey or line verification: Checked before construction, so the fence starts in the right place.
- Warranty: Workmanship coverage that a DIY install simply doesn’t have – a real value when a post fails in three years.
The comparison isn’t materials versus labor. It’s materials-plus-your-time-plus-repair-risk versus a fixed professional price. Once you price out your own hours, the chance of a footing redo, and the drag of an unpermitted fence at resale, DIY comes out ahead only on small, low-risk projects. For most Richmond homeowners, the math favors professional install – and the upfront pricing from a reputable contractor makes the number concrete. If you’re considering assembling a bigger outdoor project that same season, our Driveway & Pavers in Richmond service is a good companion guide for sequencing the work.
What Professional Fence Installation Actually Involves
Seeing the process makes the price make sense. Here’s what a compliant professional install looks like from a homeowner’s side of the property:
- Site assessment and line check. The contractor walks the fence line, checks against a survey or plat map, and confirms setbacks and any HOA or easement rules.
- Permit application. If the fence needs a permit, the contractor pulls it and coordinates the inspection. This is the step DIYers most often skip and regret.
- Footing layout and digging. Post holes are dug to the correct depth and diameter for the fence height and soil, spaced per the material system’s requirements.
- Concrete footings. Posts are set in concrete, plumbed, and braced to cure. This is where the engineering decision turns into a physical one.
- Rails, panels, and pickets. The fence body goes up to the correct height, with consistent spacing and proper fasteners for the material.
- Gates and hardware. Gates are hung square, with hinges and latches aligned so they swing clean and latch for years.
- Inspection and cleanup. If a permit is in play, the inspection is scheduled and passed, and the job site is cleaned up.
Notice how much of that list is invisible once the fence is finished. The fence looks the same whether it was permitted or not, footings set correctly or not. What differs is what happens in year three, and what happens at resale. When we connect Richmond homeowners with independent installers, the part we insist on is this unseen work. It’s also why the Groundwork Construction Co. of Richmond home approach favors a fixed quote that includes permits, inspection, and workmanship coverage rather than the cheapest line item.
Common Mistakes to Avoid
- Skipping the permit because “it’s just a fence.” This is the most common and most expensive DIY mistake in Richmond. An unpermitted fence becomes an escrow problem years later, and the fix costs more than the permit ever would have.
- Digging on an unverified property line. A fence built even slightly onto a neighbor’s lot can become a dispute the moment a survey is done, and surveys happen when either home sells.
- Setting posts too shallow. The footing has to match the fence height and the soil, and shallow footings fail in expansive Richmond clays within a couple of seasons.
- Ignoring the corner-lot height rule. Corner lots and front yards face stricter height and setback rules than rear yards, and a fence built to the rear-yard height on the front line can get a removal order.
- Skipping neighbor notice. A short conversation first prevents most complaints, and a complaint can trigger a city inspection even when the fence is otherwise fine.
- Buying a panel system and installing it wrong. Systems like Barrette and Master Halco are built to specific post spacing and hardware specs. A confident DIYer with the wrong spacing can void the material warranty.
- Forgetting the gate. Gates carry more load and swing than fence panels. A gate hung plumb on a footing that’s a fraction off plumb will sag within a year.
When to Call a Professional
Call a licensed contractor for any project that touches a footing, a property line, a permit, or a height or setback rule – which covers most new fences. The specific scenarios where we’d recommend stopping DIY: any fence over the permit height threshold in your zone; any fence on or near a property line, especially without a recent survey; corner lots and front yards with stricter height rules; HOA or easement restrictions; a fence longer than about 30 feet or taller than about 4 feet, where footing load matters; and any fence replacing a structure that’s already leaning or failing. Repairs, staining, and hardware swaps remain yours to do. Groundwork Construction Co. of Richmond offers free estimates in Richmond – call (833) 700-4611 to get an upfront price before you commit to either path.
Frequently Asked Questions
Usually yes, if the fence is over the local height threshold (commonly around 6 feet, with stricter limits for front yards and corner lots), and the exact rule depends on your zoning and lot type. A fence built without a permit can surface as a problem during a home sale, when the buyer’s lender or title company flags it. Call (833) 700-4611 and we’ll help you figure out what your specific lot requires before you start.
Yes, if you verify the height and setback rules for your zone, pull the required permit, get a survey or confirm the property line, and set footings to the correct depth and diameter in concrete. The part that trips most first-time DIYers isn’t the building – it’s the permitting and the footing depth. If you’re not confident on either, professional installation is the safer path. Call (833) 700-4611 for a free estimate.
It can, and it’s the most common way a DIY fence becomes expensive. An unpermitted fence can stall escrow while a permit is retroactively pulled and inspections are passed, and if the fence doesn’t meet setback or height rules, it may have to be removed. Buyers can also use the issue to renegotiate price. A licensed contractor pulls the permit and handles inspection as part of the install, which closes that risk entirely.
Deeper than most homeowners guess, and the exact depth depends on fence height, wind load, soil, and the frost line. Richmond’s soils include expansive clays that move with moisture, which is why a shallow footing can look fine for a season and then lean. Footings should be set in concrete, not gravel, and sized for the fence’s load. A licensed installer will spec the correct depth for your fence – this is the part we’d most strongly steer away from DIY.
Staining, sealing, hardware swaps, gate adjustments, minor rail replacement, and replacing single pickets or boards on an existing, permitted fence are all reasonable DIY tasks. The line is structural and legal: once you’re setting new posts, changing the fence line, or altering the height, you’re into permit-and-footing territory. For anything beyond maintenance, the smart move is a call. Call (833) 700-4611 for a free estimate.
Professional installation usually costs more upfront on paper but less once you count permit fees, tool rental, your own time (realistically 30 to 60 hours for a 100-foot fence), and the risk of a footing redo that can run several hundred to over $1,000 per post. DIY is the better deal only on short, simple fences on flat ground well inside the property line. For a precise, upfront number on your project, call (833) 700-4611 – estimates are free.
The Bottom Line
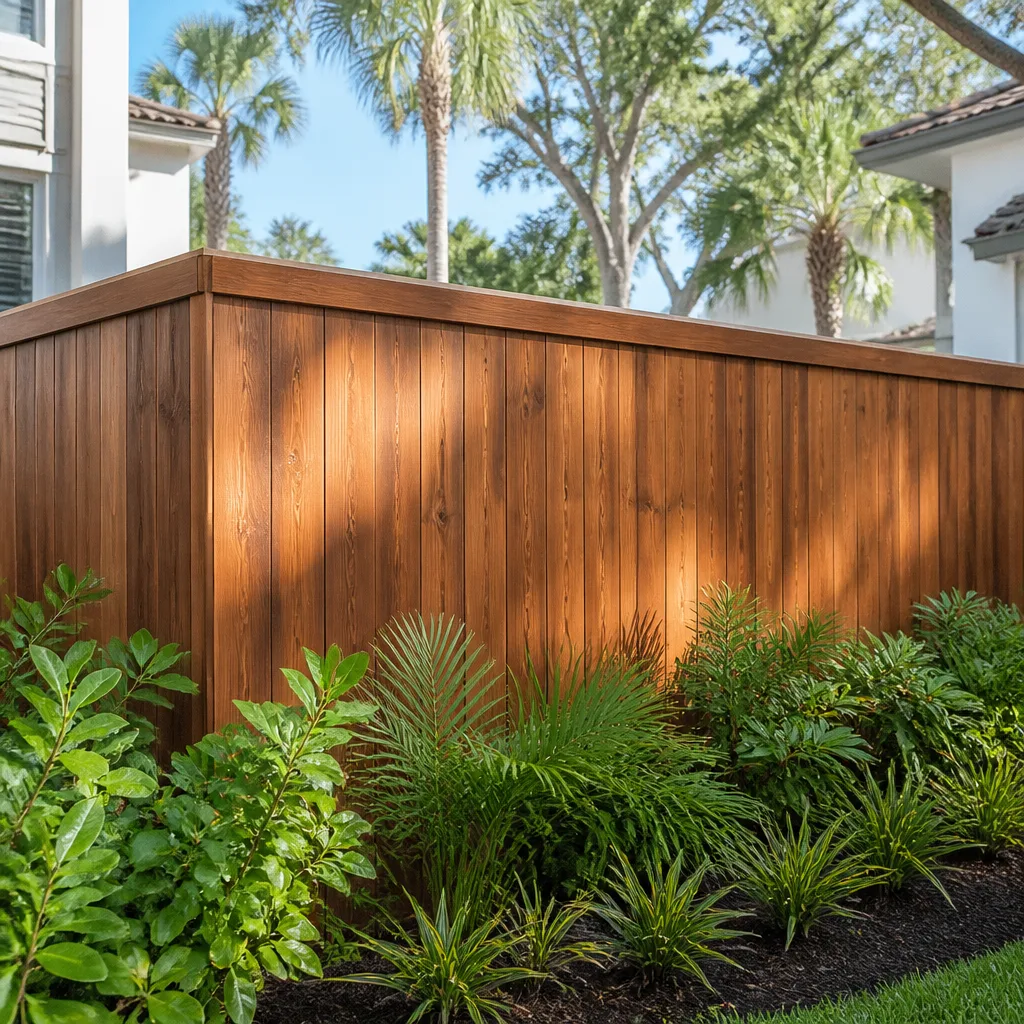
The real DIY-versus-professional line on a fence isn’t physical – it’s legal and structural. Staining, hardware swaps, minor rail repair, and picket replacement are safe to handle yourself. Installing a new fence is where permits, property lines, and footing depth in Richmond’s clay soils turn a weekend project into a title problem, a neighbor dispute, or a footing redo. The cost comparison only favors DIY on small, low-risk fences well inside the property line. For anything taller, longer, or near a boundary, a licensed installer earns the price on the parts you can’t see once the fence is up.
If you’re planning a bigger project around the fence – a gate structure, an outbuilding, or a garage – our Home Additions & ADU in Richmond service can help you scope it correctly from the start.
Ready to price the job before you buy materials? Call (833) 700-4611 for a free estimate from Groundwork Construction Co. of Richmond. Calls are answered by a live person 24/7, technicians are background-checked and arrive in uniform, and every project is covered by our 730-Day Done Right Promise. The number you see is the number you pay.
Written by the team at Groundwork Construction Co. of Richmond.
See the difference
 Before
 After
 Before
 After
 Before
 After