Last updated November 18, 2026




Free written scope consultation - allowances, timeline, and change-order rules on paper before a single trade is scheduled
The Complete Fence Installation Guide for Richmond Homeowners
Richmond’s prevailing winds off the Bay regularly hit 20 – 30 mph, and a fence sized and set for calm inland conditions will be on the ground within five years, sometimes much sooner. That’s not a scare tactic. It’s what we see along the shoreline in Point Richmond and the open ridge lines above the Richmond shoreline every time a big blow rolls through. Most fencing guides you’ll find online were written for a generic suburb with mild weather and no coastal exposure. This one is different. Over the next few thousand words we’ll walk through wind load requirements, which materials survive Bay Area salt air, when Richmond and Contra Costa County require a permit, what California law says about neighbor notification, and what fence installation actually costs here. If you’re planning a new fence in Richmond, this is the guide we’d hand you in person.
Quick Answer
Fence installation in Richmond typically costs $45 – $95 per linear foot installed, depending on material and wind exposure. A standard 6-foot wood privacy fence runs $55 – $75 per linear foot in most Richmond neighborhoods, while reinforced systems for exposed coastal sites can push toward $90 – $110. Most residential fences in Richmond under 6 feet don’t require a building permit, but fences over 6 feet, fences in the coastal zone, and fences on corner lots with sightline rules often do, so confirm before you dig.
Styles & brands we work with
- Kitchen remodeling
- Bathroom remodeling
- Home additions & ADU
- Roofing
- Windows & doors
- Driveway & pavers
- Fence
Table of Contents
- Why Richmond’s Wind Load Changes Everything About Post Depth
- Which Fence Materials Survive Bay Area Salt Air
- Richmond and Contra Costa County Permit Triggers
- California Neighbor Notification and HOA Rules Before You Dig
- What Fence Installation Actually Costs in Richmond
- The Installation Process, Step by Step
- Common Mistakes to Avoid
- When to Call a Professional
Why Richmond’s Wind Load Changes Everything About Post Depth
Most fence failures we inspect in Richmond aren’t material failures. They’re wind failures, and they trace back to posts that were set to inland specs. A standard 6-foot dog-ear cedar fence installed in a calm suburb uses posts set roughly 24 inches deep in concrete. That works fine where wind rarely exceeds 15 mph. Along Richmond’s coastal exposure zone, the same fence gets a different treatment because the load pushing against the panels during a 30 mph gust is roughly four times what it was designed for.
Here’s the practical difference. When we spec fencing for a Richmond property inside the coastal exposure zone, the posts go deeper, the spans get shorter, and the fasteners get heavier.
- Post depth. Coastal exposure fencing uses posts set 30 – 36 inches deep, below the frost line and into stable soil, versus the 24 inches common inland.
- Post spacing. Standard spacing is 8 feet on center. In high-wind zones we tighten to 6 feet, which cuts the unsupported span and dramatically reduces panel deflection.
- Post size and material. 4×4 posts work for inland fences with short spans. On ridge-exposed sites in the Richmond hills, we often spec 4×6 or even 6×6 posts to handle the moment load.
- Concrete volume. Each post hole gets more concrete to increase the mass resisting overturning. A 30-inch-deep, 12-inch-diameter hole uses roughly 1.7 bags of 80-pound mix versus the 1 bag you’d see on a light inland install.
- Wind-rated panels. Open-rail designs, board-on-board construction with gaps for airflow, and certain metal panels perform better in wind than a solid privacy panel because they let the pressure pass through instead of acting as a sail.
The good news for Richmond homeowners is that the wind problem is solvable. It just costs a little more up front. A wind-rated fence built to coastal exposure specs will last decades where a cheap inland-spec build fails inside five years. To see how we handle this on Richmond properties specifically, look at our Fence Installation in Richmond service page.
Which Fence Materials Survive Bay Area Salt Air
Salt air is the second environmental factor most guides ignore. Richmond sits on the Bay, and the fog belt that rolls through Point Richmond, Marina Bay, and the neighborhoods near the Richmond shoreline carries salt-laden moisture that accelerates corrosion on metal and warpage on improperly sealed wood. Material choice isn’t just aesthetic. It’s a durability calculation.
Here’s how the common fence materials hold up across Richmond’s climate zones, ranked roughly by long-term performance in coastal exposure.
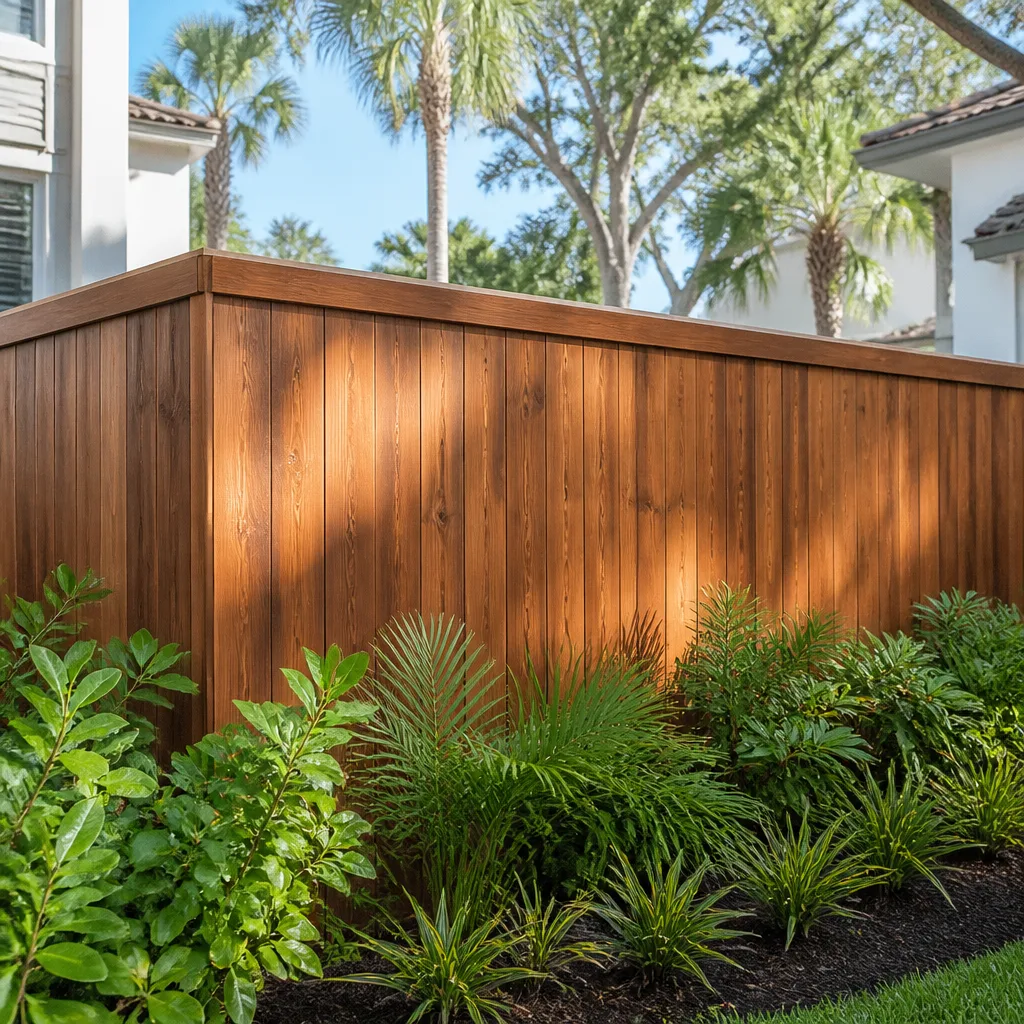
- Composite fencing. Composite is the material we recommend most often for Richmond coastal properties. It doesn’t rot, doesn’t take paint or stain, and resists salt air without surface degradation. Premium composite brands are UV-stabilized so they don’t chalk or fade under Richmond’s summer sun. Cost is higher, but the maintenance savings over 20 years are significant.
- Vinyl (PVC) fencing. Modern vinyl is a strong performer in salt air because it doesn’t corrode. The key is buying UV-stabilized vinyl, not the bargain-box product that goes brittle and yellows. Quality vinyl in a wind-rated assembly handles Richmond’s gusts well.
- Aluminum and steel. Aluminum or steel ornamental fencing is excellent in coastal environments if it’s powder-coated for corrosion resistance. Non-powder-coated steel rusts through fast in Richmond’s marine air. If you spec metal, insist on a coating spec suited to coastal exposure.
- Cedar and redwood. Natural wood performs respectably when properly sealed and maintained. The catch is maintenance; in Richmond, wood fencing needs re-sealing every 2 – 3 years to fight moisture and salt, and it rots quickly if neglect sets in. Board-on-board cedar handles wind well but requires upkeep.
- Pressure-treated pine. Treated pine is the cheapest material and the one we least often recommend for Richmond coastal work. It’s prone to warping under salt-air moisture cycling and needs aggressive maintenance to last. It’s a fine material inland, less so within a half-mile of the Bay.
- Chain link. Chain link is durable but rarely a great fit for residential Richmond properties on visibility and aesthetics grounds. It’s rarely specified except for specific utility or pet-containment needs.
If you’re weighing composite pavers for a walkway leading to your new fence, we cover that separately in our guide to Driveway & Pavers in Richmond. Material partnerships like Tremron and Techo-Bloc show up on both sides of the yard more often than you might expect.
Richmond and Contra Costa County Permit Triggers
Fence permitting is where homeowners get surprised in Richmond. The rules aren’t complicated, but they aren’t obvious either.
The first thing to know: Richmond’s city code and Contra Costa County rules layer together depending on where your property sits. A fence in unincorporated county territory falls under county rules; a fence inside Richmond city limits falls under city rules.
Here’s the practical map.
- Fences 6 feet or under on a standard interior lot. In most cases, no building permit is required inside Richmond city limits for a standard residential privacy fence under 6 feet. Verify with the city before you dig, because the ruleset has changed over the years.
- Fences over 6 feet. Any fence over 6 feet tall typically triggers a permit requirement and may need a variance depending on the zone and sight line requirements. Plan for 4 – 8 weeks of lead time if a permit is in play.
- Corner lots. Fences on corner lots face sight-triangle rules meant to keep visibility safe for drivers. You often can’t build a 6-foot solid fence right at the corner; most cities require a lower section or setback on the corner side. Richmond is no exception.
- Coastal zone and shoreline properties. Properties near the shoreline or inside Richmond’s designated coastal influence areas may face additional review. Fences that could affect views or sightlines get more scrutiny than a standard backyard build.
- Retaining walls combined with fences. If the fence sits on or behind a retaining wall over 4 feet, the retaining wall itself usually needs a permit. That’s true even where the fence alone would not.
- Fences over easements. If your property line overlaps a utility easement, you may not be permitted to build a permanent fence there without a release or approval. Title documents often show these.
What happens if you skip the permit? The city can require you to tear the fence down and rebuild to code, which doubles your cost. That’s the worst-case scenario, but we’ve seen it happen in Richmond. Pulling the permit isn’t optional insurance; it’s a way of proving the fence meets code before a neighbor complaint triggers a review. Groundwork pulls permits and passes inspections as standard practice, and we’ll tell you clearly when a permit is needed and when it isn’t.
California Neighbor Notification and HOA Rules Before You Dig
California has specific fence law that applies before the first post goes into the ground, and this is where a lot of Richmond homeowners get blindsided. The issue shows up around boundary-line fences and shared fence responsibility.
California Civil Code sets out specific rules around “good neighbor fences,” which are fences on a shared property line. The rules around shared responsibility, notification, and cost-sharing between adjacent property owners have specific legal mechanics. If you and your neighbor disagree about the location, height, or material of a boundary fence, the resolution process is not “just build it and let them complain.” It’s a formal notice-and-response situation.
Here’s what to handle before installation begins.
- Confirm the property line with a survey. No fence should go up without a clear property line. If there’s any uncertainty, pay for a survey. A fence built 6 inches into the wrong parcel is a lawsuit, not an oversight.
- Notify adjacent property owners in writing. Even when you’re building fully on your own property, a written heads-up 30 days before construction is standard courtesy and frequently required by HOA rules. Keep a copy.
- Review HOA CC&Rs. Many Richmond HOAs and planned communities have specific fence material, height, color, and style restrictions. Composite fence styles approved in one Richmond community may not be approved in another. Get written HOA approval before ordering material.
- Check the shared fence agreement. If your existing fence is on a shared line, the previous owner may have had a written cost-sharing agreement. Read it before you replace the fence, and don’t assume you can recover half the cost from a neighbor who didn’t sign on.
- Plan for view disputes. Richmond properties with views of the Bay or other open sunsets can generate view complaints when a new fence goes up. Some HOAs and city deed restrictions protect views in ways that surprise homeowners.
The rule is simple: something goes wrong on neighbor-law fencing, the fix costs more than the fence. Handling notification properly up front is the cheapest part of the project.
What Fence Installation Actually Costs in Richmond
National averages on fence installation cost are close to useless in Richmond. Coastal exposure requirements, permitting, and the material upgrades that hold up in salt air all push real numbers above the national line. Here’s what fence installation actually costs in Richmond in our experience.
Per-linear-foot installed costs in Richmond
- Pressure-treated pine privacy fence, 6 ft: $45 – $60 per linear foot
- Cedar privacy fence, 6 ft: $55 – $75 per linear foot
- Composite privacy fence, 6 ft: $70 – $95 per linear foot
- Vinyl privacy fence, 6 ft: $65 – $85 per linear foot
- Aluminum ornamental, 5 – 6 ft: $75 – $110 per linear foot
- Wind-rated reinforced assemblies (coastal exposure zone): $90 – $130 per linear foot
Line-item breakdown of a typical 100-foot, 6-foot cedar fence in Richmond
- Materials (posts, rails, pickets, concrete, fasteners): $2,200 – $3,200
- Labor and installation: $2,800 – $4,000
- Post-hole digging and concrete setting: $600 – $1,100
- Haul-away of old fence (if applicable): $400 – $900
- Permit fees if required: $150 – $600 depending on scope
- Optional gate installation: $400 – $800 per gate
Total for that 100-foot cedar fence usually lands between $6,000 and $9,000 in Richmond. If the site is in the coastal exposure zone and requires reinforced posts and tighter spacing, expect to be $8,500 – $12,000 for the same linear footage.
One variable that catches people: concrete cost. Richmond fence projects with deep posts and tight spacing use more concrete than a standard install, and bag cost per foot is real. If a bid comes in significantly below these ranges, ask specifically what post depth and spacing the installer plans. A cheap fence built short will be a cheap fence that fails.
Groundwork uses upfront pricing, no surprises. The number you see is the number you pay. Our 0% financing for 18 months and $1,000 off projects over $10,000 make larger fence runs easier to justify, and the free project estimate and design consult makes the first step low-commitment. If you’re already looking at a driveway pour, it’s worth reading our Driveway & Pavers in Richmond guide because combining a fence and driveway project on a single schedule often saves money.
The Installation Process, Step by Step
Here’s what a professionally installed Richmond fence looks like from day one to final walkthrough.
- Site walk and layout. We walk the property line, identify utilities, assess wind exposure, and mark post locations. We check for buried irrigation, gas, and power lines before digging.
- Utility locate. A free call to 811 gets underground utilities marked. Skipping this is how a fence project turns into an emergency repair and a fine.
- Permit application and HOA approval. Where permits or HOA approval are required, this happens before any digging. Timeline varies from 2 weeks to 8 weeks depending on the city and the HOA.
- Removal of the existing fence. Old panels, posts, and concrete go out to the truck. Old fence removal is included in most quotes we provide.
- Post-hole excavation and setting. Holes are dug to spec (24 inches for inland, 30 – 36 inches for coastal exposure), posts are set in concrete, and the curing period is 24 – 48 hours before panels go up. This is the step where wind-rated fencing lives or dies.
- Rail and panel installation. Rails go onto the posts, then panels or pickets. Fastener choice matters here; coastal exposure fencing uses galvanized or stainless fasteners to prevent corrosion.
- Gates and hardware. Gate posts are set with extra depth and often extra bracing. Hinges and latches are chosen for outdoor salt-air durability.
- Final walkthrough. We walk the whole fence with you, check post plumb, panel alignment, gate swing, and confirm everything meets the spec we agreed on.
Most residential fence installations we complete in Richmond take 2 – 5 days of on-site work, plus the 24 – 48 hours of concrete cure. Larger runs or complex terrain (our Richmond hillside properties with retaining considerations, for example) can take a week or more.
Common Mistakes to Avoid
- Building to inland wind specs in Richmond’s coastal exposure zone. Twenty-four-inch posts on 8-foot spacing work in Sacramento. Along Richmond’s Bay shoreline they don’t. Post depth and spacing are the difference between a fence that lasts and one that doesn’t.
- Skipping the utility locate. Hitting a buried gas or irrigation line during post excavation turns a $7,000 fence into a $15,000 emergency. The 811 call is free and takes two days.
- Ordering material before HOA approval. Richmond HOAs have specific style, color, and height restrictions. If you order material and the HOA rejects the design, you eat the cost of restocking or reselling.
- Fencing to a property line you assumed was correct. A survey costs a few hundred dollars. A fence built 6 inches onto a neighbor’s parcel is a legal dispute that can cost 10 times as much.
- Specifying the cheapest pressure-treated pine in coastal Richmond. Treated pine in salt air has a short life. If you’re within a half-mile of the Bay, composite, vinyl, or powder-coated metal will save you money over the long run.
- Using non-galvanized fasteners on a coastal install. Regular steel fasteners rust through in a season or two in Richmond’s marine air. Galvanized or stainless isn’t an upgrade; it’s the baseline.
- Ignoring the corner-lot sightline rules. Richmond enforces sight triangles on corner lots, and building a 6-foot solid fence right at the corner can result in a stop-work order and rebuild.
See the difference
 Before
 After
 Before
 After
 Before
 After
When to Call a Professional
A few scenarios where calling a professional is the right call: your site is in the coastal exposure zone and needs wind-rated engineering, your property line is on a slope or includes a retaining wall, the project needs permits, the site is a corner lot with sightline rules, or the design depends on a specific HOA compliance requirement. And any fence project on a Richmond property that’s been burned once by an unlicensed installer is a good reason to get a written bid from a licensed, insured contractor. Groundwork Construction Co. of Richmond offers free estimates in Richmond. Call (833) 700-4611 to schedule yours. All our technicians are background-checked and arrive in uniform, and calls are answered by a live person 24/7.
Frequently Asked Questions
Fence installation in Richmond runs $45 – $95 per linear foot installed for standard residential fencing, with coastal exposure builds pushing $90 – $130 per linear foot. A typical 100-foot, 6-foot cedar privacy fence in Richmond lands at $6,000 – $9,000 total; composite, vinyl, and reinforced systems run higher. Call (833) 700-4611 for an exact quote; estimates are free and include a design consult.
In most cases, fences 6 feet or under on a standard interior-lot property in Richmond don’t require a building permit, but fences over 6 feet, corner-lot fences with sightline rules, and fences on coastal-zone properties typically do. Confirm the requirement for your specific parcel before digging. Groundwork draws the permit and takes it through inspection on every Richmond fence project that needs one.
Composite and UV-stabilized vinyl perform best in Richmond’s salt air because they don’t corrode and don’t require sealing. Powder-coated aluminum is also excellent for coastal Richmond sites. Cedar and redwood hold up reasonably well if they’re sealed every 2 – 3 years. Pressure-treated pine is the least recommended in coastal exposure areas because it warps and degrades faster.
For most inland portions of Richmond, 24 inches with 8-foot post spacing works. In the coastal exposure zone along the Bay and on exposed ridge lines, 30 – 36 inches with 6-foot spacing is our standard because the wind load is roughly four times higher than in inland-spec conditions. Post depth and spacing are the difference between a fence that lasts five years and one that lasts twenty-five.
Many Richmond HOAs and planned communities have specific rules on fence material, height, color, and style, and require written approval before installation. Getting approval before ordering material is the cheapest way to handle it. Read the CC&Rs, submit the design, and keep the written approval on file before the first post goes in.
Most residential fence installations in Richmond take 2 – 5 days of on-site work, plus 24 – 48 hours for the post concrete to cure before panels go up. Larger runs, hillside properties, or sites with complex permitting can take a week or more. Groundwork confirms timing in the written estimate before work starts.
The Bottom Line
Richmond isn’t a generic fence market. The wind load requirement for coastal exposure, the salt air that shortens the life of cheap materials, the permitting rules around height and corner lots, and the neighbor-law notifications all matter here in ways they don’t in a typical inland suburb. Build to inland specs and you’ll be replacing the fence inside five years. Build to Richmond’s actual conditions and the fence does its job for decades. Every Groundwork fence installation is covered by our 730-Day Done Right Promise, and every quote we hand you is upfront pricing, no surprises. If you want a straight conversation about what your fence needs, see our Groundwork Construction Co. of Richmond home page or call us today.
If you’re planning a bigger change around the property, our Home Additions & ADU in Richmond guide covers what it takes to add square footage alongside the fence line, and our Driveway & Pavers in Richmond guide covers hardscape work that often gets scheduled alongside fence installation.
Get a Free Fence Estimate in Richmond

Fencing in Richmond is a project where the details matter: wind exposure, salt air, permit requirements, neighbor notification, material choice. Every Groundwork Construction Co. of Richmond fence project starts with a free project estimate and design consult on your actual site, so the price you get reflects your property rather than a national average. Our technicians have up to 12 years of experience, they arrive background-checked and in uniform, and calls are answered by a live person around the clock. Financing is available at 0% for 18 months, and every project over $10,000 gets $1,000 off. Call (833) 700-4611 to schedule your free estimate and get a written line-item quote.
Written by the team at Groundwork Construction Co. of Richmond.