Last updated November 18, 2026



Free written scope consultation - allowances, timeline, and change-order rules on paper before a single trade is scheduled
Driveway & Pavers Maintenance Schedule: What to Do and When
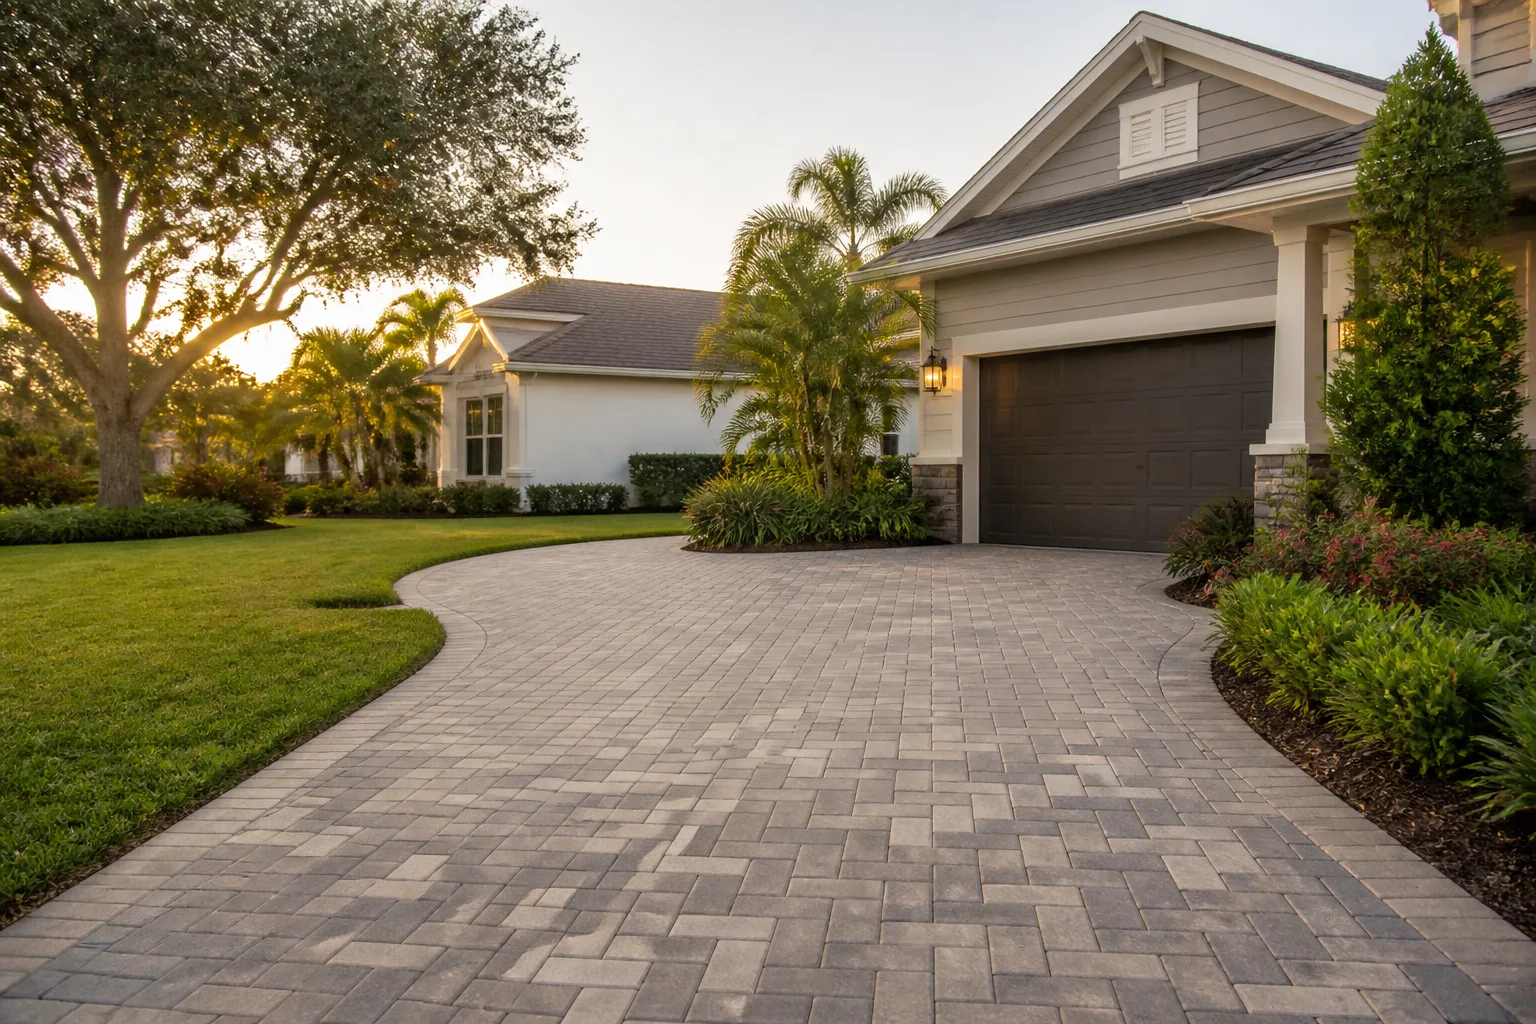
The most important maintenance window for a new paver driveway is 90 days after installation, not years later. Almost no one tells homeowners that until it’s too late. In those first three months, joint sand settles, edge restraints get their first real test from traffic, and the sealing decision you make shapes how the driveway ages for the next decade. Miss it, and you’ll spend three times the effort playing catch-up. Here’s the exact calendar we use for paver driveways across Richmond, from the 90-day checklist through seasonal tasks, sand decisions, and the sealing debate most guides avoid.
Quick Answer
A paver driveway needs its heaviest attention in the first 90 days after installation (sand top-off, edge check, first sealing decision), then a two-touch annual routine: a 15-minute spring inspection and a fall prep before Richmond’s November rains. Deep cleaning happens every 1-2 years, and re-sealing every 3-5 years depending on paver type and exposure. The counterintuitive part: front-loading effort in year one costs a weekend. Skipping it costs hundreds to thousands.
Styles & brands we work with
- Kitchen remodeling
- Bathroom remodeling
- Home additions & ADU
- Roofing
- Windows & doors
- Driveway & pavers
- Fence
Table of Contents
- The First 90 Days: Your Most Important Window
- The Annual Calendar: Richmond’s Wet Season Timing
- The 15-Minute Spring Inspection
- Polymeric Sand: Top-Off vs. Replacement
- The Sealing Debate Settled
- Cleaning, Weeds, and Stain Removal
- When to Repair Instead of Maintain
- Common Mistakes to Avoid
- Frequently Asked Questions
The First 90 Days: Your Most Important Window
New pavers look finished the day the crew leaves. They’re not. What you’re seeing is a system that’s still settling into itself. The base is bedding down, joint sand is working into gaps, and edge restraints are taking their first load. The first 90 days are when that system either locks in tight or starts drifting.
Here’s the checklist we walk homeowners through at the 90-day mark:
- Top off joint sand. Even a well-installed driveway loses 10-20% of its joint sand to settling and light traffic in the first three months. Low joints let water in, and water is the enemy of every paver driveway. Fill every joint flush to the chamfer.
- Inspect the edge restraints. Walk the perimeter with a rubber mallet and check that every spike is seated and every restraint is tight against the paver edge. In Richmond, we see edge failures on driveways where cars clip the border on the way in. Catch it now, not after a whole row has spread.
- Look for settling or rocking pavers. Step on each paver. Any that rock, or that sit visibly lower than neighbors, mean something is wrong underneath: base compaction, a drain issue, or water moving where it shouldn’t.
- Decide on sealing. Fresh pavers need to cure before sealing, typically 60-90 days depending on the manufacturer. That puts your first sealing decision right in this window.
- Check drainage flow. Stand at the top of the driveway during a hose test and watch where water goes. It should sheet toward the street or a drain, not pool against the garage threshold or your house foundation.
If you bought a home with an existing paver driveway, treat the first 90 days of your ownership the same way. You have no idea when the previous owner last topped sand or checked edges, and it’s the cheapest hour of work you’ll ever put into the property.
The Annual Calendar: Richmond’s Wet Season Timing
Richmond gets the bulk of its rain between November and March. That single fact drives the whole annual schedule. Everything that protects your driveway from water needs to happen before the first real storm, not after you’ve already found the problem. Here’s how the year breaks down.
- March-April (post-rains recovery): Walk the driveway after the last big storm and note any new settling, shifted pavers, or weed growth in joints. This is the year’s reset point, and it’s when a lot of Richmond homeowners discover the winter pushed a corner or opened a joint.
- May-June (deep clean): Pressure wash at low-to-moderate pressure, spot-treat stains, pull weeds by the root, and re-sand any joints that opened over the wet months. This is your heavy lifting for the year.
- July-September (dry-season work): This is the safest window for sealing, since pavers need 24-48 hours of dry weather and overnight temperatures above roughly 50°F. It’s also the right time for any repairs, since base material settles predictably in dry soil.
- October (pre-wet-season prep): The most important two weekends of the year. Top off every joint with sand, clear the drain and gutter path, move any debris that could dam water, and confirm the driveway’s slope is still shedding water toward the street. By late October, you want every joint full and every edge tight.
- November-February (rest and watch): Minimal intervention. After heavy storms, do a quick walk and note anything that’s changed. Don’t pressure-wash in the wet months; you’ll push water into joints that are already saturated.
Two touches a year (spring inspection, fall prep) plus one deep clean is the baseline. In our experience, homeowners who do this in Richmond see paver driveways go decades without major repair, while the ones who “wait until something looks wrong” are usually calling us after a base failure.
The 15-Minute Spring Inspection
Most expensive paver repairs trace back to a problem that was visible in spring and ignored until fall. The fix is a single 15-minute walk-through every March or April. You don’t need tools beyond your eyes, a hose, and a rubber mallet.
- Walk the full perimeter. Look for pavers that have pushed out past the edge restraint, or border pavers that have shifted their line. Two minutes.
- Rubber-mallet test every 10-15 pavers. A dull thud means solid; a hollow or ringing sound means a void underneath. Note the location of every hollow-sounding paver.
- Hose-test the drainage. Run water at the top of the driveway and watch it flow. It should sheet evenly toward the street. Any pooling, standing water, or water running toward the house is a red flag. Three minutes.
- Scan every joint. Look for joints more than roughly ¼-inch below the paver surface. Those are the joints to top off first. Also note any weeds; they’re a sign of open joints, not a sign that your driveway is ruined.
- Check the garage threshold and house edge. Water damage at these transition points is the single most expensive paver problem we see in Richmond. If the driveway has settled here, water is getting in somewhere it shouldn’t.
- Photograph everything. A phone photo of each trouble spot on the same March weekend every year gives you a real comparison. A paver that looks “a little off” is hard to judge from memory alone.
This routine catches roughly 80% of problems while they’re still $50 fixes, not $800 repairs. It’s the highest-return fifteen minutes in the entire schedule.
Polymeric Sand: Top-Off vs. Replacement
Polymeric sand is the bonded sand that fills the joints between pavers. It’s the reason pavers don’t migrate, and the reason water doesn’t sheet straight through the joints into the base. It’s also the part of the system homeowners ask about most, and the part most often handled wrong.
Here’s the framework for deciding between a top-off and a full replacement.
Top-off: when the sand is still bonded underneath
- The top inch or so of joint sand has eroded, but the sand beneath is firm and intact.
- Joints are ¼-inch low or less, and only in scattered areas.
- No sand is washing out of joints during rain.
- You’re doing this as routine fall prep before the wet season.
Top-off is a targeted job: fill the low joints with matching polymeric sand, mist it in, and let it cure. It’s a homeowner-friendly weekend task and doesn’t require a crew.
Replacement: when the bond has failed
- The sand in joints is soft, powdery, or crumbling when you scrape it.
- You’re seeing sand wash out of joints during heavy rain or after a pressure wash.
- Joints have failed across a wide area, not just in one traffic lane.
- Weeds are pushing up through multiple joints, which means water and light are getting under the surface.
- Joint depth is ½-inch or deeper across multiple sections.
Full replacement means scraping out the old sand (or using a joint-cleaning tool), re-filling every joint, compacting, and re-misting. It’s a full-day project for a standard residential driveway, and it’s worth doing right the first time. Wrong sand, or applied in wet or cold conditions, will fail within one wet season in Richmond.
Rule of thumb: if you can top off, top off. If the existing sand crumbles in your fingers, replace. A full replacement every 4-6 years is normal for busy driveways; a driveway that’s topped off properly every fall can stretch that to 8 years or more.
The Sealing Debate Settled
Ask five contractors how often to seal pavers and you’ll get five answers. Here’s what actually damages pavers faster: over-sealing. Sealing a driveway too often, or with the wrong product, traps moisture under a film. That trapped moisture plus Richmond’s wet winters equals efflorescence (white powdery bloom), mold growth, and eventual face-spalling of the pavers themselves. Under-sealing is gentler; the pavers just age a bit faster and absorb more stains.
Here’s the practical schedule we recommend:
- New pavers: seal once at the 60-90 day mark after the pavers have fully cured, then re-seal every 3-5 years.
- Concrete pavers (most Richmond driveways): every 3-5 years with a penetrating sealer. Penetrating sealers soak in and let the surface breathe; film-forming sealers sit on top and are the usual cause of over-sealing problems.
- Clay brick pavers: every 4-6 years. Clay is denser and more moisture-resistant, so it needs less.
- Exposed aggregate or heavily textured pavers: 2-4 years; the texture gives water more places to sit.
- Skip the seal entirely if the driveway is in a high-traffic, sun-exposed area and you’re not dealing with stains. Modern quality pavers don’t strictly need sealing, and skipping it is often the better call. Sealer is a protective and aesthetic choice, not a requirement.
How to know if it’s time to seal
Do the water-drop test. Pour a small cup of water on the pavers and watch it. If the water beads and rolls off, the sealer is holding. If it absorbs in immediately and darkens the surface, it’s time to seal again. That test is more reliable than a calendar for any specific driveway.
What actually damages pavers faster than anything else
Driving a power-washer at full pressure directly down into joints, over-sealing with film-forming products, and salt de-icing (which is rare in Richmond but worth knowing if you drive up to Tahoe). Those three beat “not sealing” every time as far as damage goes.
Cleaning, Weeds, and Stain Removal
Cleaning keeps pavers looking right and prevents small issues from becoming structural. The right approach depends on the season and the paver type.
- Routine cleaning: sweep or blow off leaves and debris weekly, especially in October when leaves trap moisture against the surface.
- Deep cleaning: pressure wash at 1,500-2,000 PSI with a wide fan tip, held at a consistent angle to the surface. Never aim straight down into a joint; that’s how sand blows out.
- Weeds: pull by hand with the root. For persistent joints, a targeted vinegar or specialty paver weed treatment works; avoid broad-spectrum herbicide, which can stain some pavers.
- Oil stains: blot immediately, then use a paver-safe degreaser and rinse. Kitchen oil on a driveway is common after any car maintenance; catch it within the first hour for the best result.
- Rust stains: use a rust remover formulated for masonry, apply to a small test spot first.
- Efflorescence: white bloom on the surface usually means moisture is trapped. It can be cleaned with a masonry efflorescence remover, but if it keeps returning, the underlying moisture problem needs attention.
We do see one Richmond-specific cleaning issue a lot: tree sap from the mature oaks and eucalyptus around the city. Sap binds to the paver face, then attracts dust and turns dark. A citrus-based cleaner on a warm day lifts it cleanly. Caught early, it’s a ten-minute job; ignored for a year, it’s a pressure wash at full effect.
When to Repair Instead of Maintain
Maintenance protects the driveway. Repair fixes it. The line between the two is the interesting one, because homeowners spend a lot of money repairing things that would have been fine with maintenance, and a lot of money doing maintenance on things that needed repair a year ago.
These are the signs your driveway needs repair, not more maintenance:
- Independent rocking pavers. Hollow sound under the mallet plus movement means the base under that paver has failed or washed out. Top-off and sealing won’t fix it.
- Widespread settling. If a whole section of driveway is sitting ½-inch low, the base has moved. The pavers need to come up and the base needs to be re-worked.
- Ponding water. Water that sits for 24+ hours after rain means the slope is off. That’s a base and grading issue, not a sand issue.
- Edge restraint failure. A section of border pavers that has spread out means the restraint system has moved. If it isn’t corrected, the spread continues with every freeze-thaw cycle.
- Heave from tree roots. Richmond has plenty of mature trees, and their root systems occasionally lift a paver or three. Individual paver replacement handles small cases; multiple lifted pavers need a proper fix.
For anything in that list, call a pro. The cost of correcting a base failure early is roughly comparable to what an ignored problem will cost after a wet season or two.
Common Mistakes to Avoid
- Waiting to seal the first year. Fresh pavers need sealing at the 60-90 day mark, not year two. Waiting lets moisture into the surface during the first winter, which is the worst possible timing.
- Pressure-washing into the joints. Aiming the wand straight down into joints blows out the polymeric sand. That missing sand is what lets weeds and water into the base. Angle the tip across the surface instead.
- Using the wrong sand. Regular sand, play sand, or generic “paver sand” will wash out of joints in a season. It has to be a proper polymeric sand formulated for pavers, with the right application conditions.
- Sealing too often. Film-forming sealers applied every year trap moisture and cause efflorescence. The water-drop test is your actual guide, not the calendar. Over-sealing damages faster than under-sealing.
- Skipping pre-wet-season prep. In Richmond, October is the make-or-break month. A driveway that enters November with low joints and a blocked drain will have a hard three months.
- Ignoring a single rocking paver. One hollow paver is cheap. One hollow paver that pushes into three neighboring pavers and turns into a base repair is not. Handle it the same season.
- Doing base-level repairs on your own. Replacing individual surface pavers is a homeowner job. Rebuilding base material, correcting slope, and resetting edge restraint is not. Poorly done base work is how a $400 fix becomes a $4,000 redo.
See the difference
 Before
 After
 Before
 After
 Before
 After
When to Call a Professional
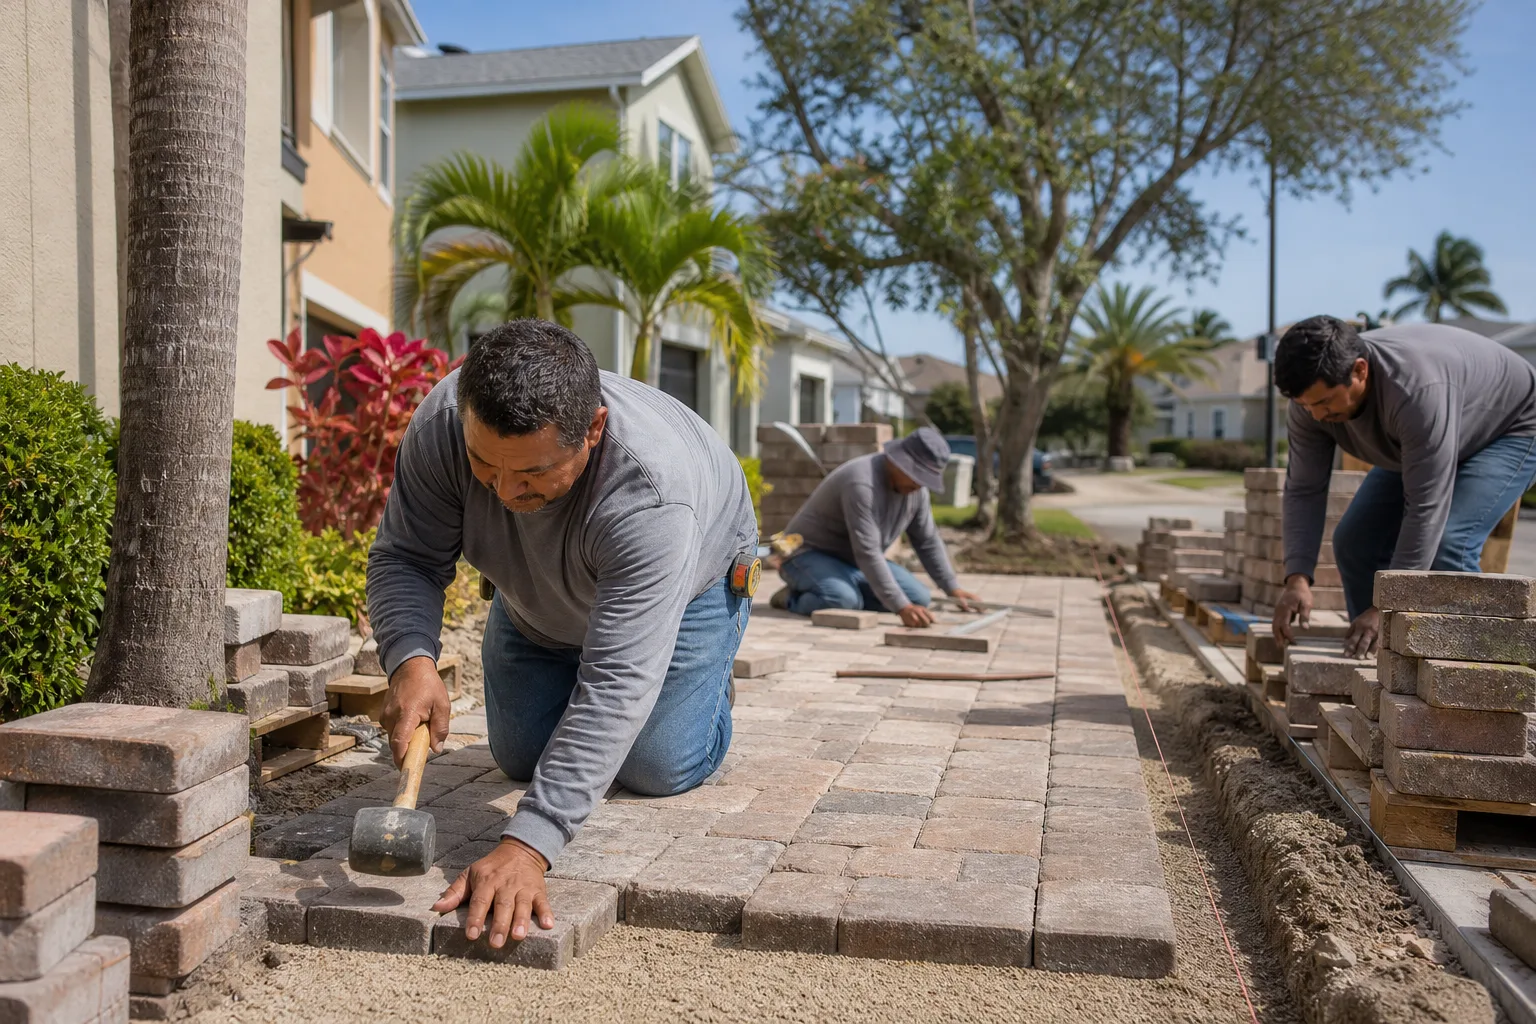
Anything that involves the base under the pavers, the edge restraint system, drainage, or slope goes to a professional. That includes rocking pavers, ponding water, settled sections, and edge spread. Base failure requires pulling pavers, re-grading and re-compacting the base, resetting the restraints, and re-laying the surface. Done wrong, it fails again within a season.
Rebuilding a driveway that’s pushed against a garage threshold or up against a fence line is the other category. The interface between the driveway and the structure is where water damage starts, and the repair has to be coordinated across the driveway, the threshold, and any adjacent fencing. This is where a single contractor for multiple trades saves homeowners money. If your driveway work overlaps with a fence rebuild or a home addition that needs a new approach, see our fence installation in Richmond and home additions & ADU in Richmond pages for how we handle those combinations.
If you’re at the repair stage, also check whether your pavers are still available from the manufacturer. Paver match is difficult after a few years. Our team can help source matching product through trusted brand partners like Belgard, and if you’re local, you can start with our driveway & pavers in Richmond page.
Groundwork Construction Co. of Richmond offers free estimates in Richmond. Call (833) 700-4611 and we’ll send someone out to give you a written assessment, not a sales pitch.
Frequently Asked Questions
Every 3-5 years for most Richmond driveways, using a penetrating sealer. New pavers should be sealed once at the 60-90 day mark after they’ve cured. The water-drop test is more reliable than a calendar: if water beads on the surface, the sealer is still holding; if it soaks in immediately, it’s time. Call (833) 700-4611 for an in-person assessment.
Yes, at 1,500-2,000 PSI with a wide fan tip, angled across the surface rather than straight into joints. Aiming the wand into joints is the most common cause of polymeric sand failure. If your driveway has soft or crumbling joints already, don’t pressure-wash it before re-sanding; that just makes the failure worse. Call (833) 700-4611 if you’re not sure your driveway is ready for a wash.
Top-off fills low joints where the underlying sand is still bonded and firm. Replacement means scraping out old sand because it’s crumbled, washing out, or has failed across a wide area. If the sand crumbles between your fingers, replace. If it’s firm but the joints are ¼-inch low, top off. Call (833) 700-4611 if you want a professional opinion before you dig in.
That’s efflorescence, a salt bloom that usually means moisture is trapped under the sealer or in the base. Clean it with a masonry efflorescence remover, but if it keeps returning, the underlying moisture source needs attention. Over-sealing is the most common cause. Call (833) 700-4611 to have someone look at it before it becomes a base problem.
Yes, generally, over a long enough horizon. A paver driveway installed and maintained to schedule routinely outlasts poured concrete by decades, because individual pavers can be replaced without visible seams, and concrete cracks from settling and freeze-thaw. Pavers move with the ground instead of cracking. In Richmond’s wet-season climate, that flexibility is a real advantage. Call (833) 700-4611 for a comparison specific to your site.
The first-winter damage is the main risk. Joint sand that’s settled leaves gaps that water gets into, and edge restraint that isn’t checked can spread before it gets formally corrected. The result is usually a base failure and a repair cost several times the original top-off. If you’re past the 90-day mark and haven’t done anything, do the spring inspection now. Call (833) 700-4611 if you’re not sure where to start.
Our focus is Richmond, and our work in surrounding neighborhoods follows the same schedules and materials standards you’ll find on the main Groundwork Construction Co. of Richmond home page. If you’re in the area, call (833) 700-4611 and we’ll tell you honestly whether we’re the right fit for the job.
The Bottom Line
The maintenance schedule for a paver driveway front-loads effort where most homeowners skip it. Heaviest attention in the first 90 days. Then a 15-minute spring inspection, an October prep before Richmond’s wet season, and a deep clean every 1-2 years. Re-sand as needed, seal every 3-5 years with the water-drop test as your guide, and repair base problems early. Do those things and you get decades of service from a driveway that will outlast poured concrete. Skip them and you spend money on the same repairs the driveway would have avoided if anyone had told you what to do and when.
If you’re ready to talk through your driveway, whether it’s a repair, a re-sand, or a full paver installation, contact us today. Call Groundwork Construction Co. of Richmond at (833) 700-4611 for a free estimate. Live person, 24/7, and every project is backed by our 730-Day Done Right Promise.
Written by the team at Groundwork Construction Co. of Richmond.